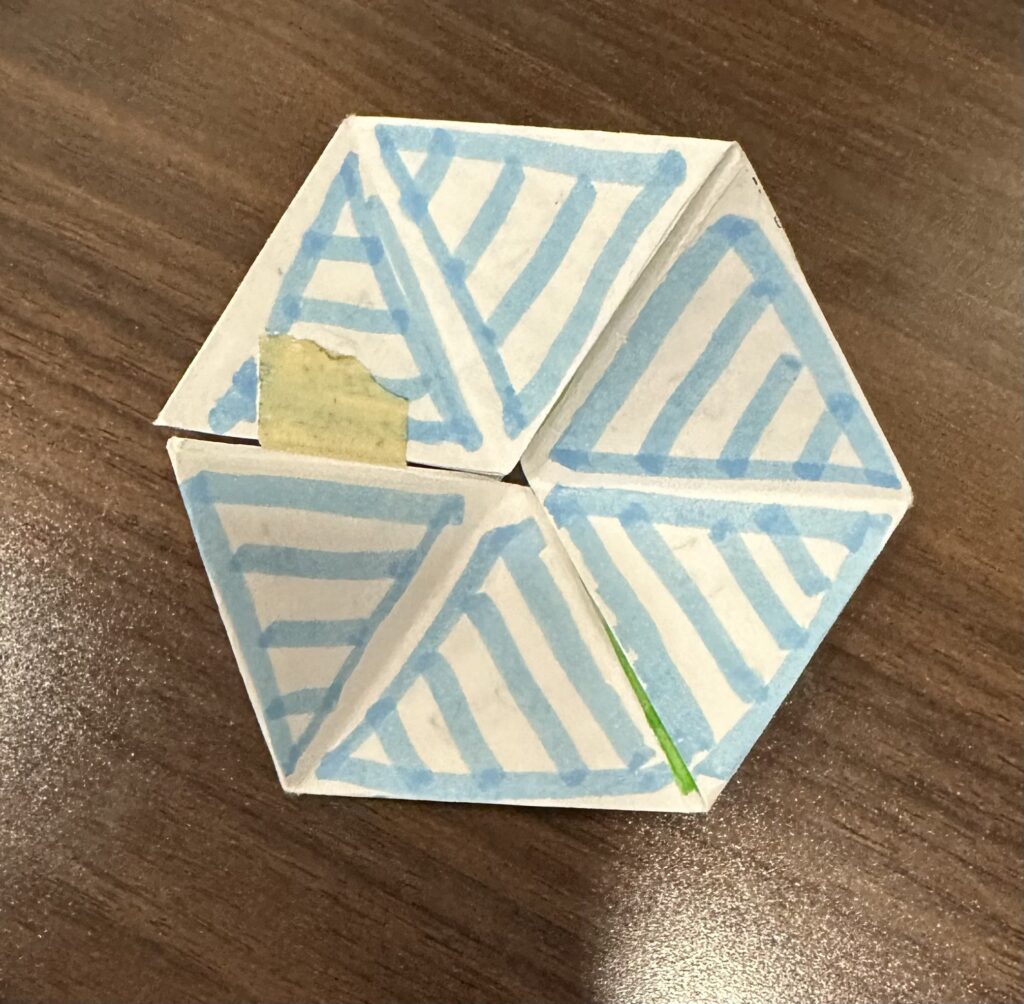
First, it seems prudent to introduce the concept of a “flexagon” itself. According to Wikipedia, flexagons are, “…flat models… that can be flexed or folded in certain ways to reveal faces besides the two that were originally on the back and front.” The hexaflexagons we’re interested in are actually trihexaflexagons- named as such due to their three faces and six sides.
In the first chapter of Martin Gardener’s book titled “Hexaflexagons and Other Mathematical Diversions,” he introduces the history of hexaflexagons. Hexaflexagons were originally discovered by Arthur H. Stone in 1939. After sharing hexaflexagons with the community at Princeton University, a hexaflexagon committee was formed. The hexaflexagon committee discovered that “the simplest way to bring out all the faces of any flexagon was to keep flexing it at the same corner until it refused to open, then to shift to an adjacent corner.” The committee also investigated the different flexagons that could be created. It turns out that flexagons can be made with any number of faces. Flexagons with an odd number of faces only have one side like a mobius strip.
The Schläfli symbol {p, q} for a polyhedron indicates a polyhedron whose faces are p-gons, and whose vertices each touch q faces. Traditionally, the Schläfli symbol {3, 6} represents a tiling of the Euclidean plane similar to the hexagonal tiling, but where each hexagon is instead composed of 6 triangles. However, we noticed that the same could be said of our hexaflexagon- it was composed of regular triangles, and when fully folded, each vertex touched six of our fabric triangles. Although the Schläfli symbol is intended to only refer to convex polyhedra, I still think that it’s an interesting observation.
The Making Process:
Before even starting the process of making a fabric hexaflexagon, we made a paper hexaflexagon- both to practice the method of making and to have a guide to use when working with the fabric.
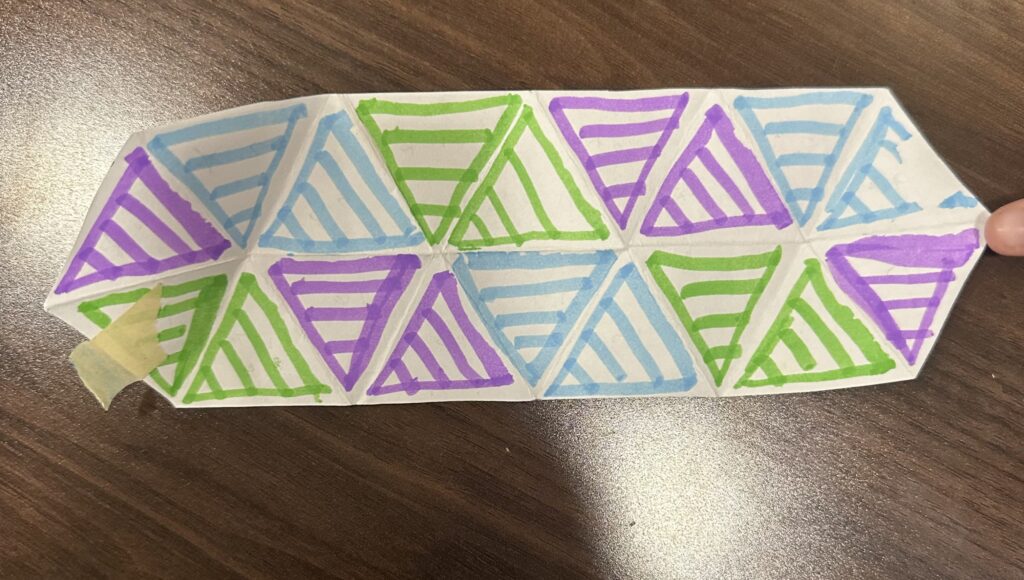
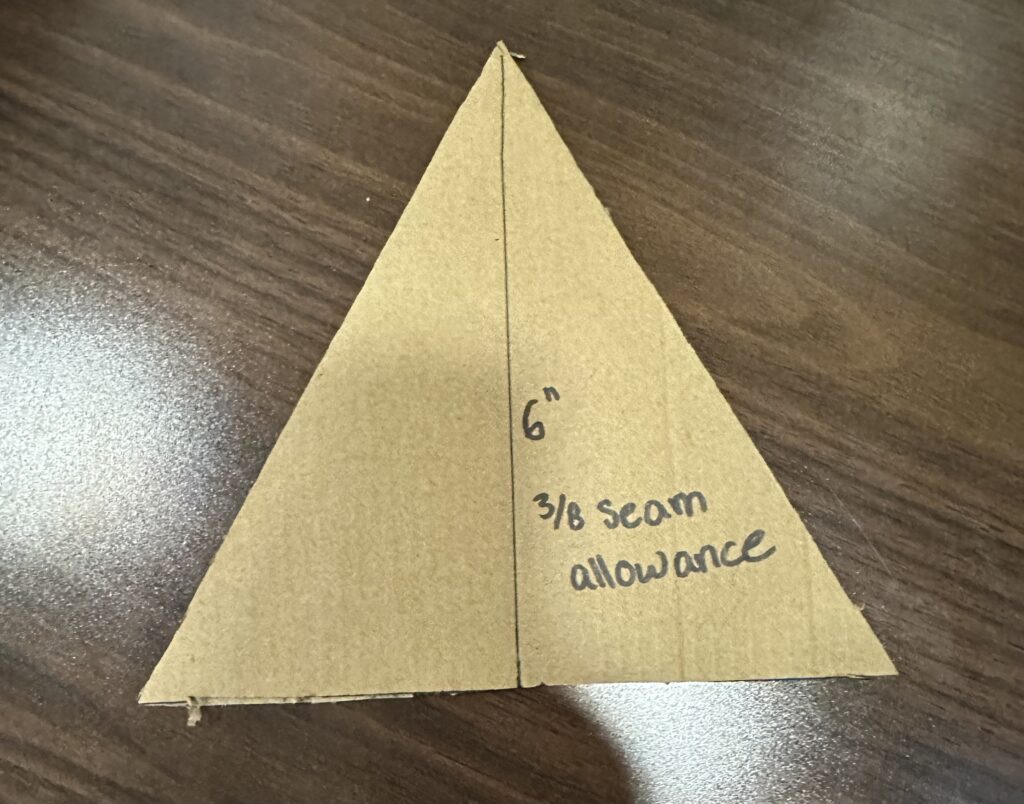
The trihexaflexagon we were aiming to make has three distinct faces, so the first step of the process was to pick out three fabrics we wanted to use. Next, we measured and traced a triangle template from cardboard, and used said template to cut six triangles each from the three fabrics we chose.
To better keep track of what went where, we numbered each of our 18 triangles according to their positions on the paper hexaflexagon guide.
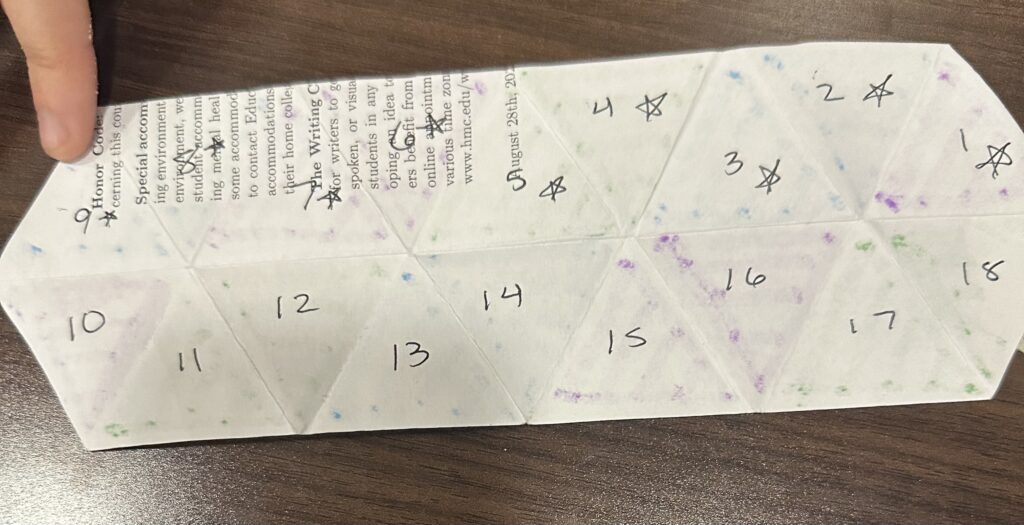
Then, we began sewing triangles together. We first sewed them together in pairs- 1 to 2, 3 to 4, and so on. Next, we sewed each of the pairs together- 1/2 to 3/4, 5/6 to 7/8, and so on. We skipped over 9/10 and decided to sew those on last. After that, we sewed the groups of four into groups of 8, and finally positioned the strips of 8 vertically and sewed those together. Lastly, we sewed 9/10 onto the end of this group of 16 to complete our 18-triangle hexaflexagon template. This turned out to be a mistake. We ended up having to sew at a weird angle to attach 9/10. This could have been avoided if we had not sewn 9/10 together and instead sewed 9 to the top strip and 10 to the bottom strip, and then sewed the top and bottom strips together.
While one of us was sewing, the other kept working on the side. This included ironing on fabric interfacing to the top 9 triangles to stiffen the fabric somewhat, as well as ironing down the sewn edges so that they wouldn’t stick out and cause issues while sewing together later.
After sewing the strips together we folded the strip in half horizontally, with the pretty sides facing each other, and sewed along the long edge. We then turned the strip inside out. This resulted in a long strip that matched the paper Hexaflexagon when folded in half.
Once we had one strip we just had to sew the last edge together. Sewing the last edge was one of the hardest steps. For each side of the strip we tucked the edges into the inside of the strip. Then we folded the strip into a hexaflexagon and sewed the last edges together. We had then finished making the hexaflexagon! The last step was to be excited and show off the hexaflexagon to friends.
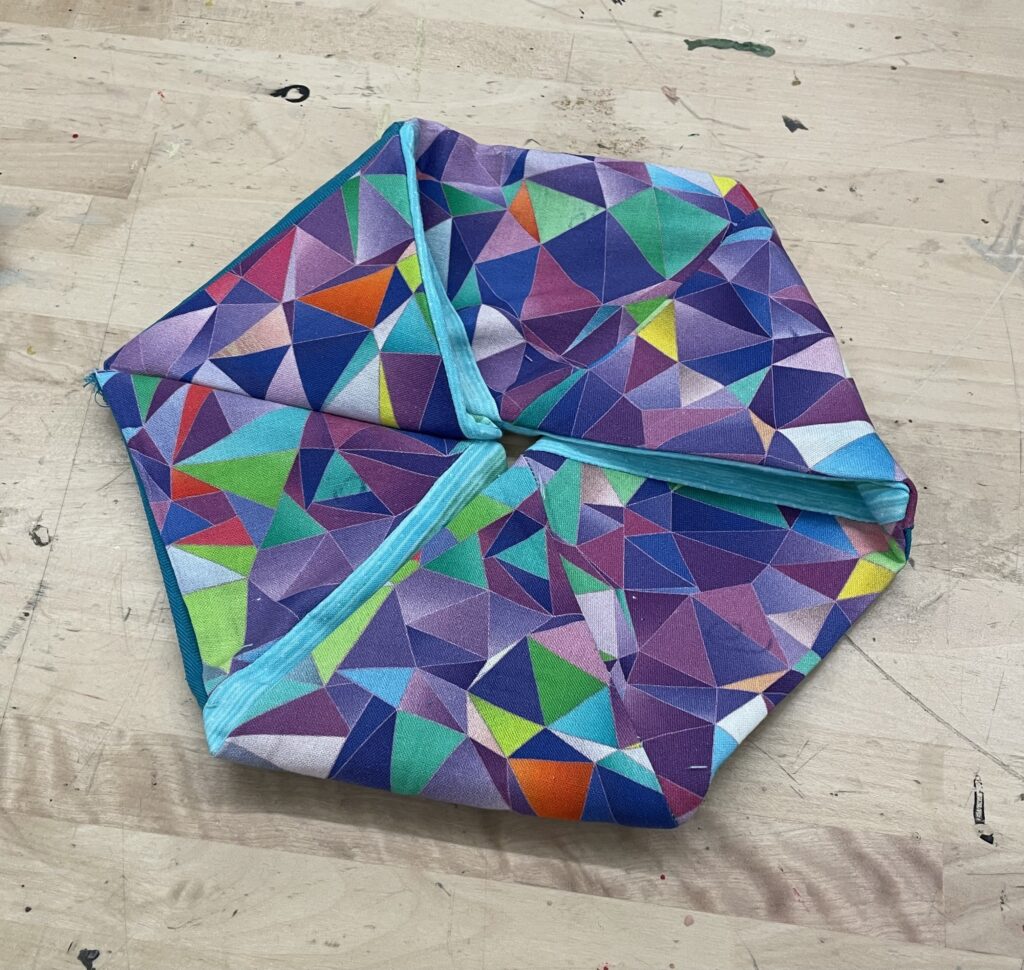
Throughout this making process we ran into a lot of difficulties. Firstly the triangles in the finished Hexaflexagon are not equal sizes or equilateral triangles. We also had multiple issues using the machines. We struggled threading the sewing machine for the first time and the machine kept coming unthreaded throughout the process. The process took a lot longer than we expected. We ended up spending 4 hours on this project. Also the fabric we chose was less stiff than paper, even with the interfacing, so it doesn’t flex as snappily as a paper hexaflexagon might. However, we found that you could pinch and pull at the material (not necessarily flexing in the way a paper hexaflexagon would require) and it would fall back into the hexaflexagon shape almost naturally.
Despite all of the struggles we successfully made a hexaflexagon!! We both learned a lot about sewing, from how to thread the machine to what fusible interfacing is. The paper template that we made was really useful and we accidentally matched the colors of our fabric hexaflexagon to the paper hexaflexagon. After a day of flexing and folding and letting it sit in hexaflexagon form it came together a bit more neatly, and retained its shape a lot more than when it was freshly sewn. The main problem we had with this project is that we only made one! The hexaflexagon is pretty and fun to mess with! Now we have to figure out who gets to keep it! 😀
Leave a Reply