Cubic Puzzles Explained
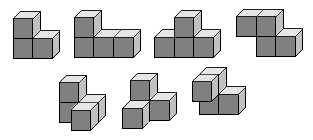
Cubic Block Puzzles are a type of puzzle that have been around for over 100 years. According to Puzzle Maker Stewart Coffin, the earliest reference to a 3x3x3 cubic block puzzle appears in the 1893 book Puzzles Old and New by Professor Hoffman. This puzzle was named “The Diabolical Cube”, and consisted of the following 6 pieces.

As the name of Coffin’s website suggests, these puzzles are created by dissecting a cube into a specific set of polycubes. The main goal of these puzzles is to then rebuild the cube with the given pieces. However, as more and more cubic puzzles have been made – including the famous Soma cube invented in 1936 – puzzle enthusiasts have discovered and challenged other people to start creating new types of shapes with the puzzle pieces. Below is a picture of the Soma puzzle pieces, and examples of some of the shapes one can create by putting them all together.

As one can see, there’s a lot of different ways that the pieces of a 3x3x3 cube can be arranged! Furthermore, when just looking at the way in which a cube can be created out of a fixed set of polycubes, most of these puzzles have more than just 1 solution (ignoring symmetries and rotations).
With this in mind, we thought it would be interesting to explore some of the factors that determine the number of different solutions and hence the “difficulty” of cubic puzzles. On the making side of things, we’ll be making our own cubic puzzles in the machine shop!
Understanding the Solution-Space of Cubic Puzzles
While doing some research on the mathematics behind Cubic Puzzles, we stumbled upon the Possibly Wrong math blog. One of the posts in this blog actually analyzes all of the different ways to split a 3x3x3 cube, and calculated the difficulty of each of the resulting puzzles through the number of ways in which the puzzle pieces could be rearranged to create the cube.
Something that the author of the blog post noticed though, was that using this definition of “difficulty” – how many solutions there are – a considerably large number of puzzles fell into the most difficult category. In fact, more than 30% of the 3x3x3 splits he tested only had 1 solution (out of the 19,276,753 possible 3x3x3 cubic puzzles involving hexacubes or smaller pieces, 5,633,564 of them had a unique solution subject to rotations and reflections) (Possibly Wrong).
Seeing the huge number of “hardest” 3x3x3 puzzles, there must be some other factor that leads to a puzzle being harder than another, as surely these 5,633,564 puzzles are not equally as difficult. With this in mind, the author of the blog post devised an even more nuanced way to measure puzzle difficulty. To do this, he measured difficulty based on the number of valid ways one could “brute force” a puzzle piece into the space of a 3x3x3 cube – he called this the breadth of the solution search tree – and divided it by the number of possible oriented solutions of that piece set. In other words, the higher the ratio of possible placements of a puzzle piece to the number of solutions of the puzzle, the harder the puzzle. Intuitively, we both liked this approach to measuring puzzle difficulty! Below are the blog post author’s results for all 3x3x3 puzzles:
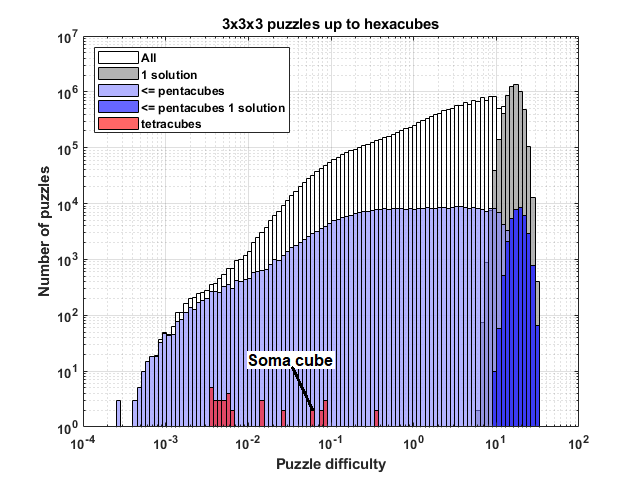
As one can see, this reduces the “hardest puzzle” group to much less than 30% of all the puzzles! Here is a candidate “hardest” puzzle using this definition of difficulty. This puzzle, according to the author of the blog, took him and his wife almost 2 hours to solve!

Through this blog post’s analysis, we can learn about some of the different factors that can influence the difficulty of cubic puzzles. On the one end, the size of the solution space of a particular puzzle is super important, as the more ways to solve it, the easier it should be. But, equally as important, is the amount of time and “piece placements” it takes to get to one of those particular solutions. Therefore, by creating a difficulty equation that takes both of these values into account, we can get closer and closer to finding the hardest 3x3x3 puzzle!
Prototyping: The Diabolical Cube
For the making part of this project, we first decided to try to recreate the Diabolical Cube puzzle by using wood. In order to do this we got one flat piece of plywood that was about 1.7 cm thick. So, our diabolical cube would essentially be composed of 27 cubes that are 1.7 x 1.7 x 1.7 cm. The pieces that make up the puzzle are different combinations of these smaller cubes, polycubes. We started by tracing out the different polycubes on our piece of wood, measuring them with a ruler. Here is a picture of one of the tracings for a piece we cut out. The x marks a spot we cut out.
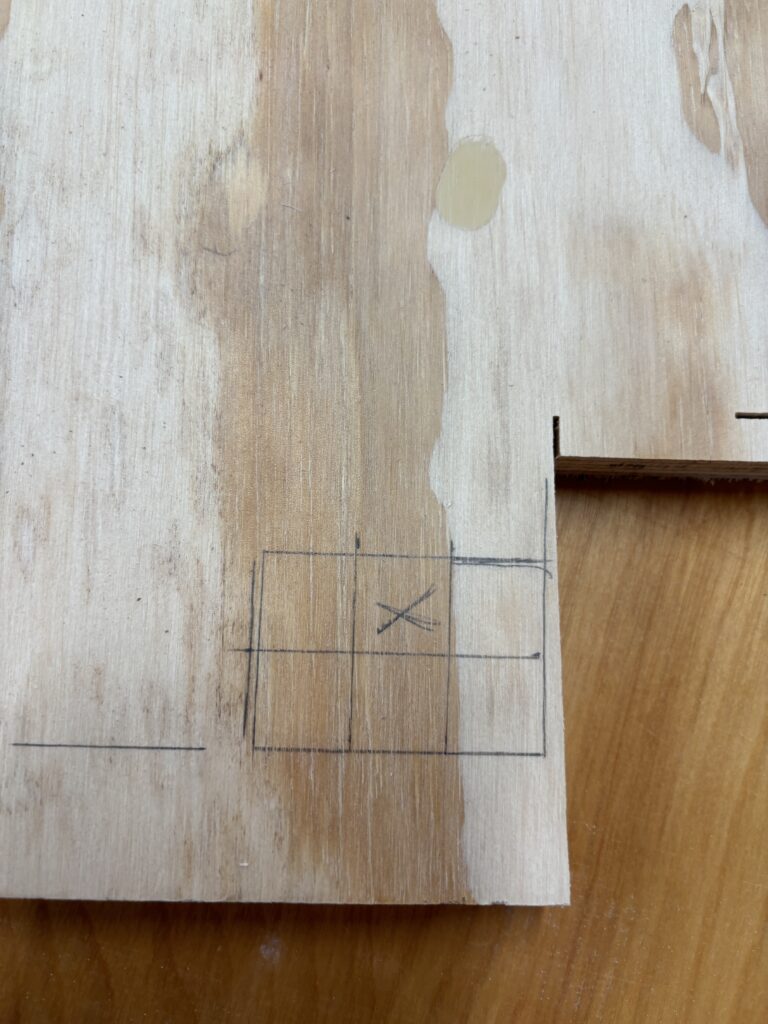
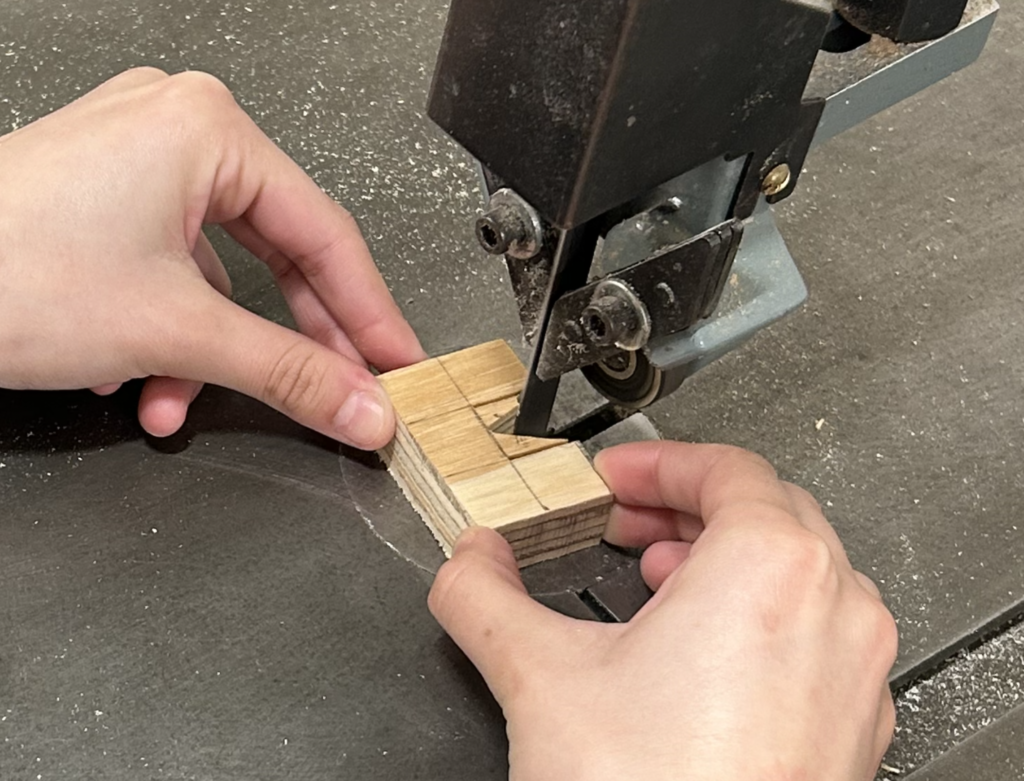
To cut out the pieces we used the bandsaw. We had minimal experience prior to this but it was surprisingly not very difficult to learn at all. The piece above was the most difficult piece to cut due to its formation but we figured out a method that made it very easy to do. The image below shows what we started to do to cut it out. We cut a v shape at first and then continued to use the bandsaw to cut out all of the wood in the middle section. It ended up working very well.
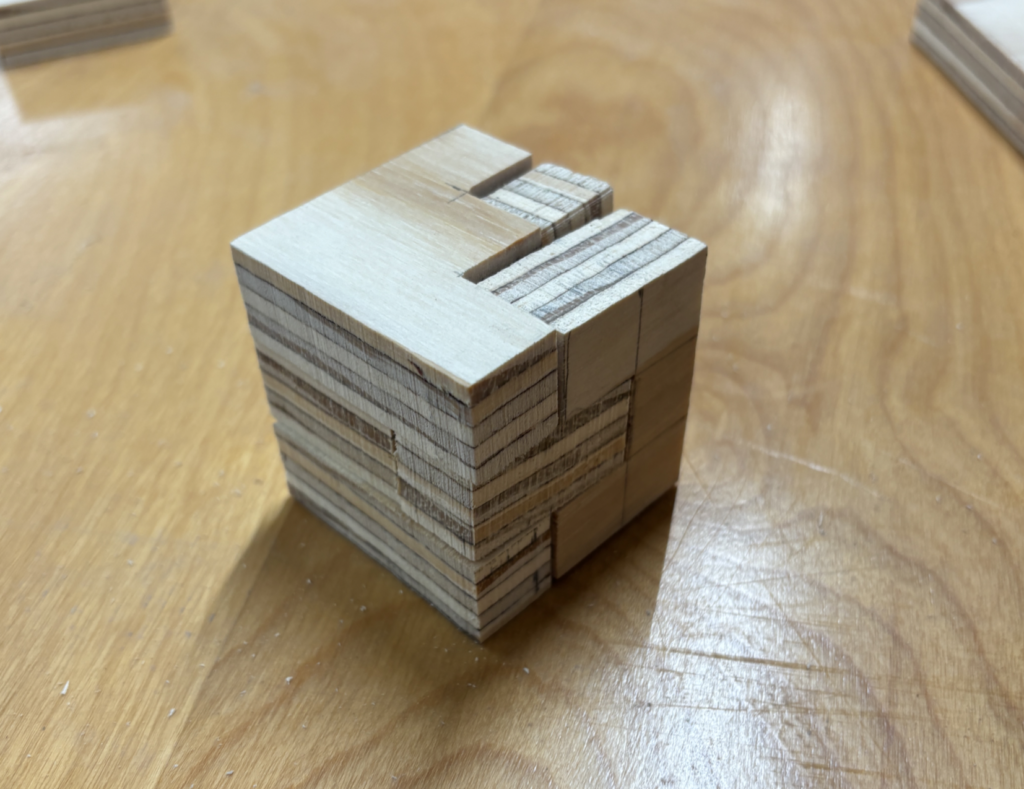
Once we cut all of our pieces out we had the complete puzzle. Some pieces fit better into others, so our measurements were not perfect, but for a first attempt we are proud of what we were able to create. Here is an image of the puzzle put together:
Creating a More Aesthetic Puzzle: The Soma Cube
We decided to make a different puzzle, The Soma Cube, also out of wood. This time, unlike our prototype, we wanted it to be much prettier and put together. We decided that instead of cutting out each piece, which would be hard with the Soma Cube pieces regardless, we would cut out the individual cubes that make up the pieces and the cube overall. Initially we wanted to make it out of metal. So, our idea was to cut out long metal rods and then just chop them up to give us a bunch of little cubes we could put together. We had intended to put these together by drilling holes and using wooden dowels. However, we worked on trying to cut out the metal rod and it was a very very slow process, while also not accurate. We started by trying to cut out a piece of flat aluminum using the vertical bandsaw and the actual blade would not stay straight so it would cut at a very bad angle. We switched to using the horizontal bandsaw which was also very slow but it seemed like it might be more accurate as it also did the work itself. Here is an image of the horizontal bandsaw cutting the metal:
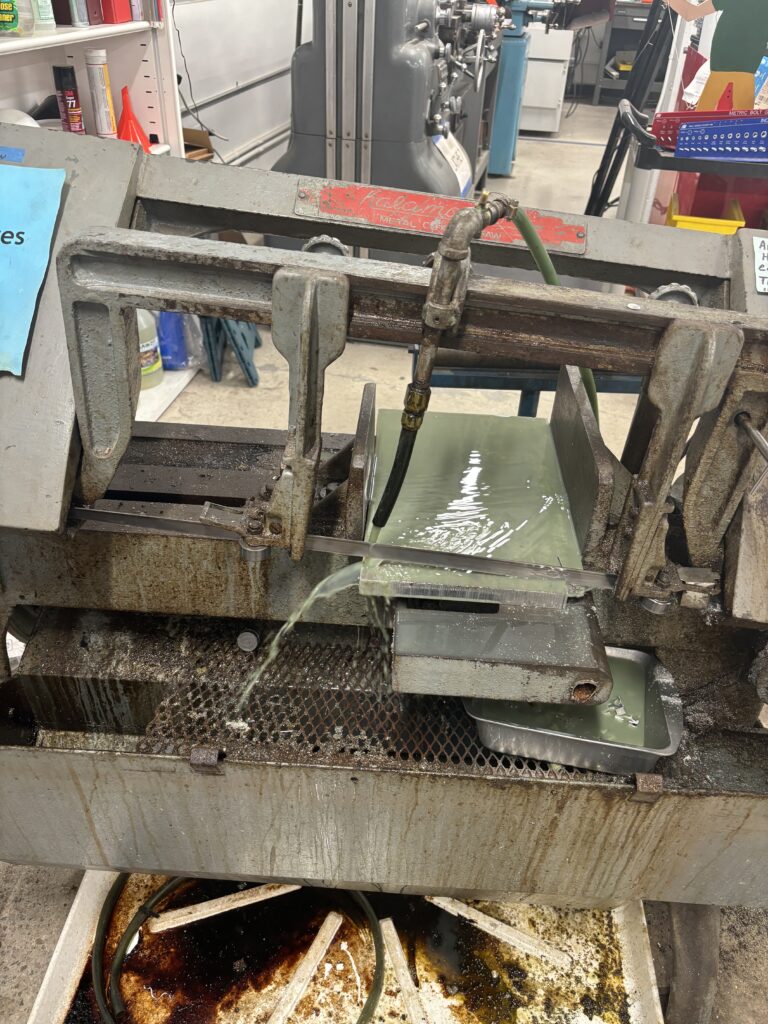
Although it looks like the metal would be cut well, once it finished cutting and we took out the piece it was very inaccurate. We realized if we wanted to then make it so it had even measurements it would take a ridiculous amount of time, and we also did not have a good method that would make the rod perfect. It was likely that whatever we were going to do would still not be accurate, which is important for the puzzle. So, we decided we would switch to wood for the Soma cube.
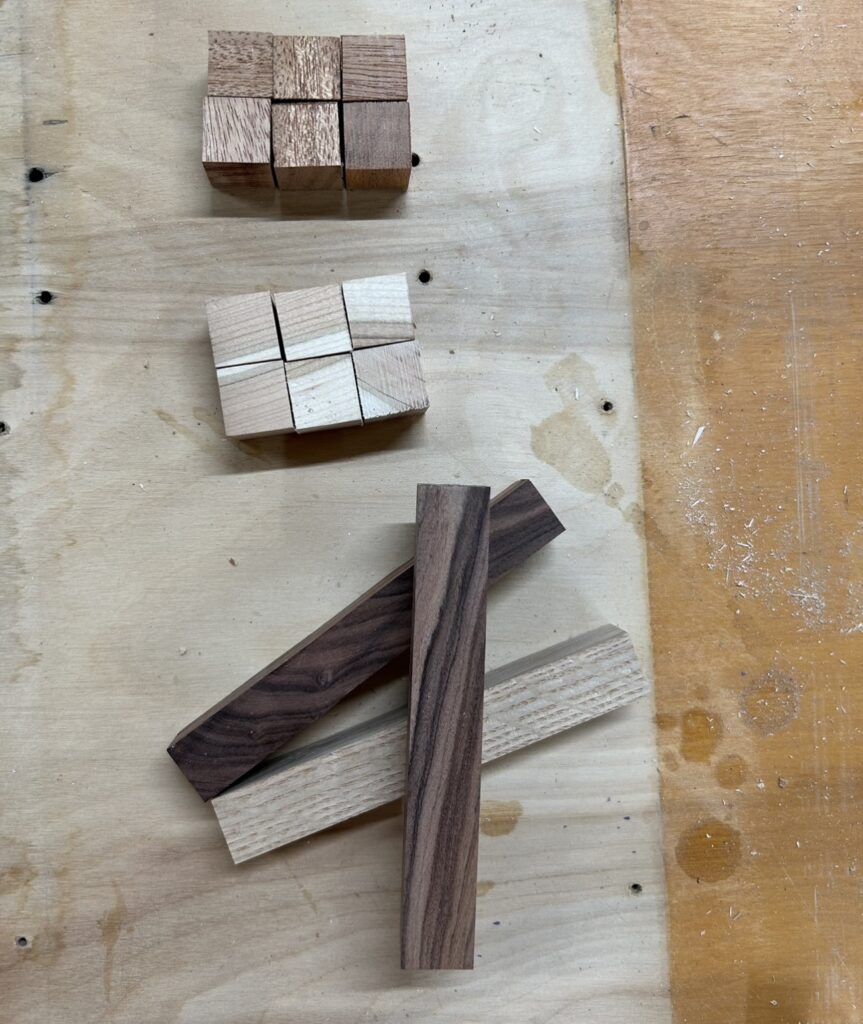
We spent some time trying to find good wooden pieces that would make the process simpler. We found a few rods of wood that we could use. They were basically what we had been trying to create out of metal, but already precut for us. We also chose different colors of wood because we thought it would be nice to make the different pieces of the puzzle slightly different colors. In order to measure the cubes we used a ruler. Given that the rods were already cut for us perfectly, we only had to make one cut in order to make a cube, which made the process simpler and more precise. We used the vertical bandsaw again to cut rods into cubes. We ended up with 27 cubes that we could then use to put together the different pieces of the puzzle. This image shows some of the cubes we cut out along with the rods we used to cut them out from:
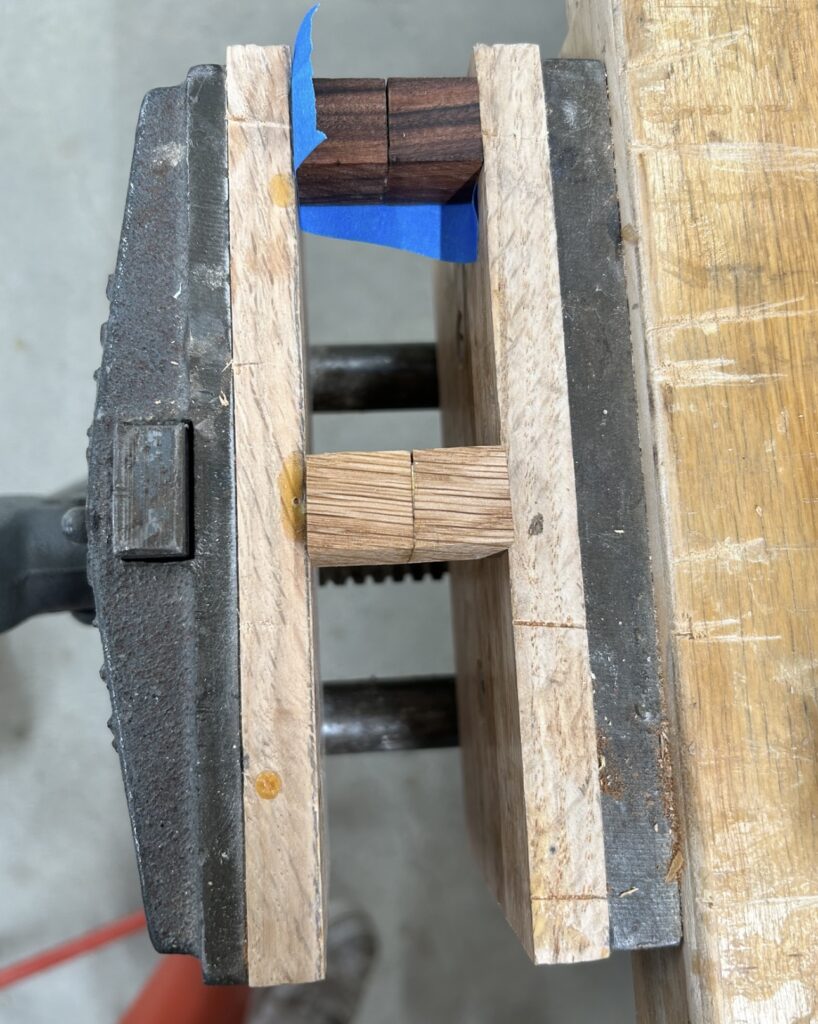
Once we cut out all of our cubes we soaked them in mineral oil. This made them look nicer and more professional. Then, in order to make the puzzle pieces themselves we used wood glue to stick the cubes together. The wood glue required us to clamp the cubes together so that they would be secure. This process took a while because most pieces are made up of a few cubes and you can only clamp one piece to another at a time. So we started by just clamping two cubes together. Once those pieces were dry, we could add another cube to continue making the piece. We had to let these pieces dry for a minimum of 30 minutes when clamped, but ideally, they would be clamped together for a couple of hours. However, given that none of these joints need to be very structural / take on a lot of force, we decided to go with the minimum gluing time. Here is an image of the pieces clamped:
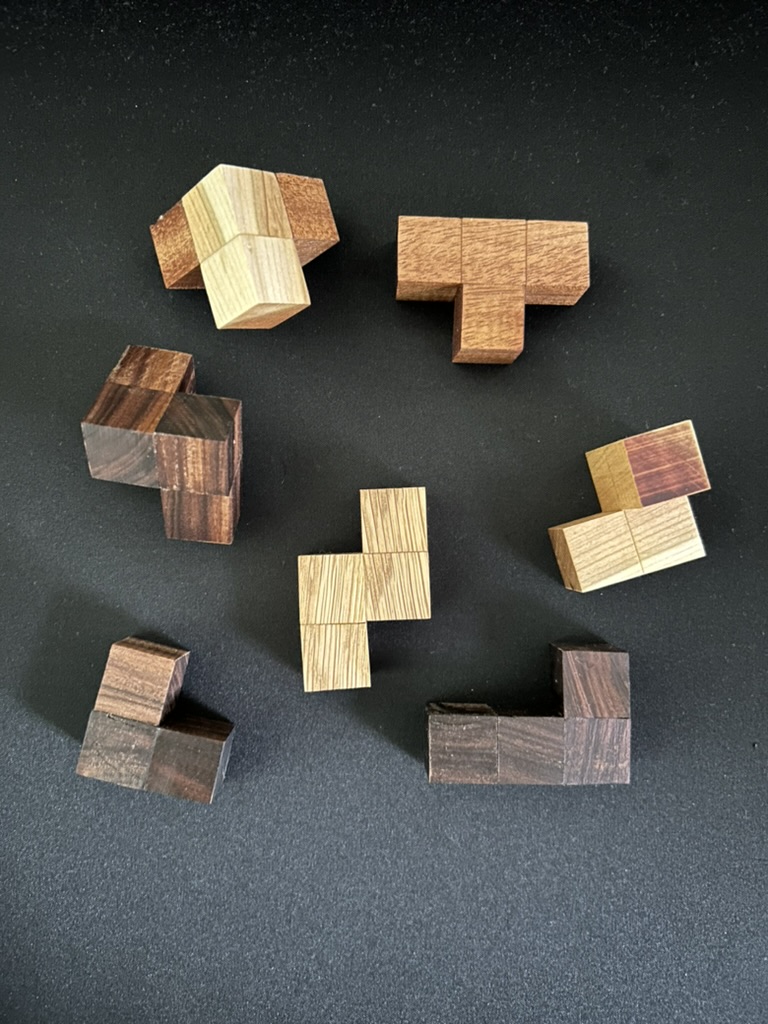
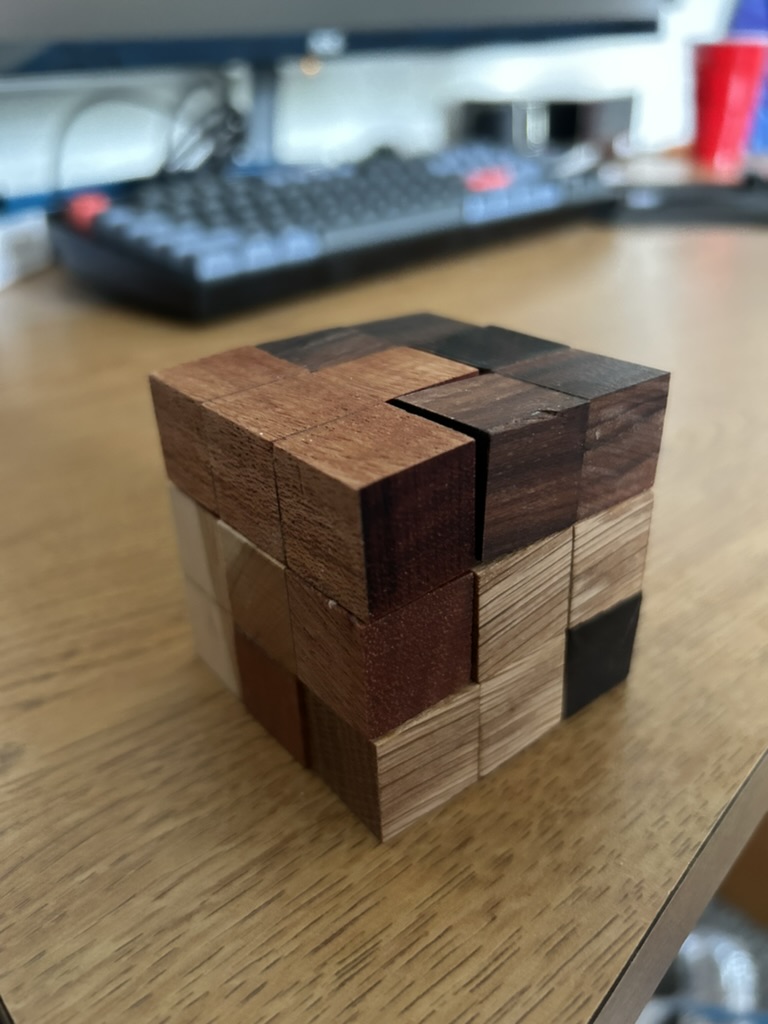
After 2 hours of gluing and clamping pieces together, we finished our Soma cube! Here are the pictures of how each of the individual pieces turned out, as well as a picture of the final cube!
Leave a Reply