
Theoretical Harvey Mudd College Projection in Blender
For our first project, we wanted to 3D print some illustrations of the stereographic projection process, in which a shape on a circle is mapped to a flat plane. This can be visualized by printing a thin shell of a sphere. If a shape is cut out correctly, and a light is shone from above, an image can be drawn out on the ground in shadows. Our goal was to create a process which would let us convert a 2d image into a printable STL file that would generate the desired shape. We could then use this STL file to 3D print the object.
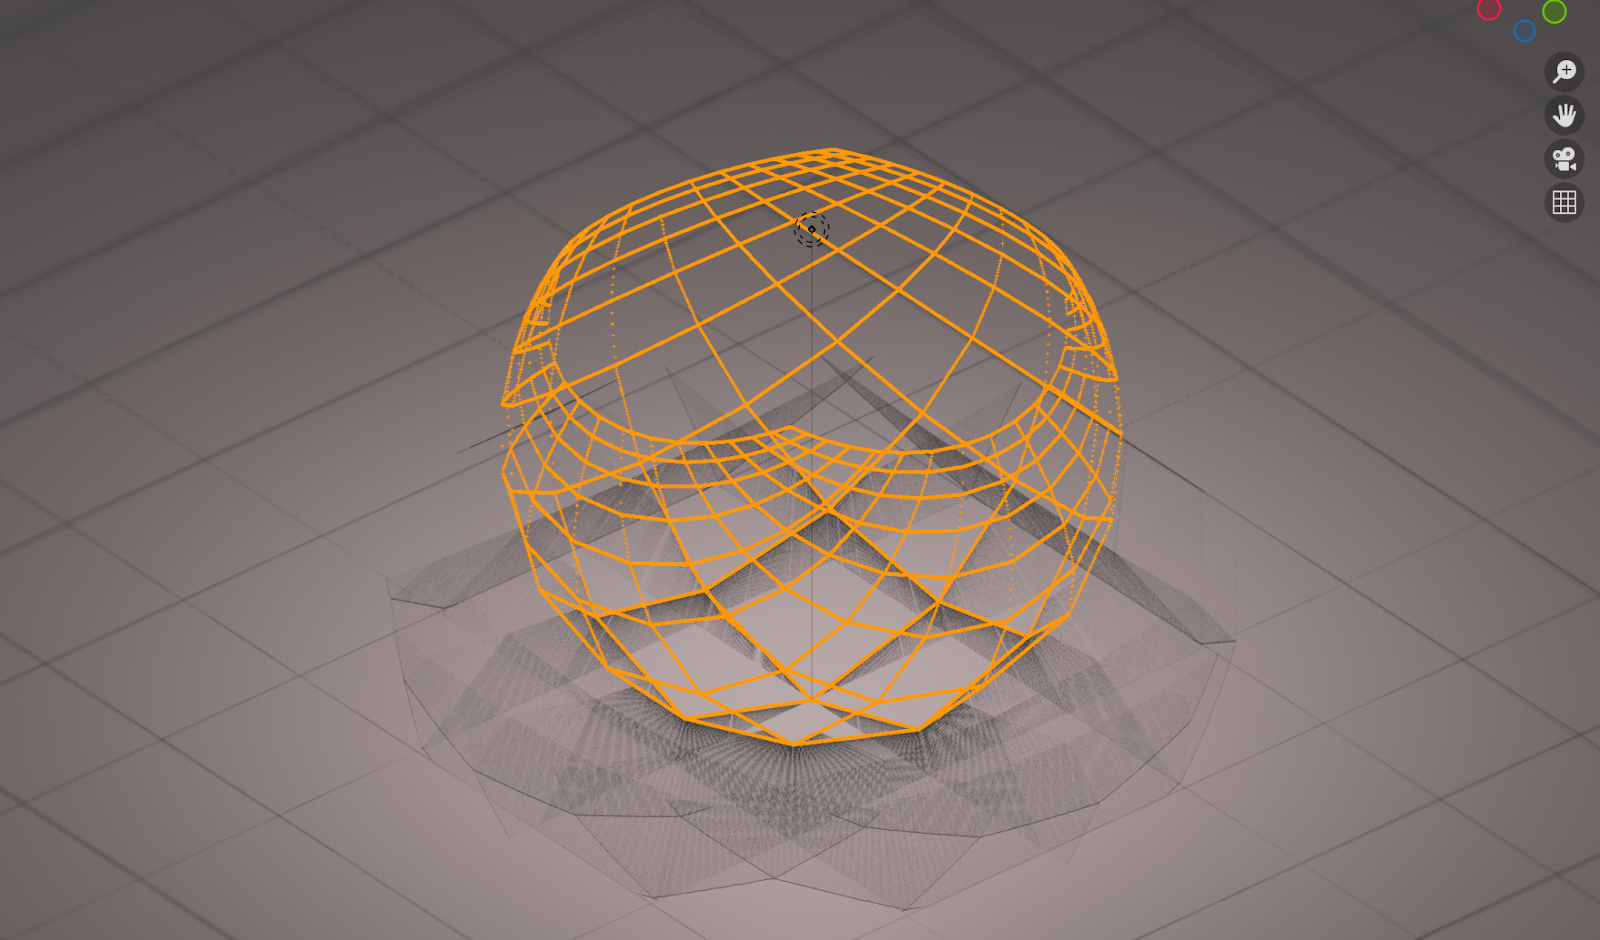
An infinitely thin wire-frame model of the original grid stereographic projection, made via Blender.
After a small amount of digging, we found an example of this projection being done in Blender, with the constraints of the shape only casting a grid shadow on the ground, and the shape being infinitely thin (link). After fiddling with the geometry nodes for the file, we generated an arbitrary mesh by sampling from an image, and wrapping that around a sphere using trigonometry. We also added some depth to the shell so that the printer could properly create it.
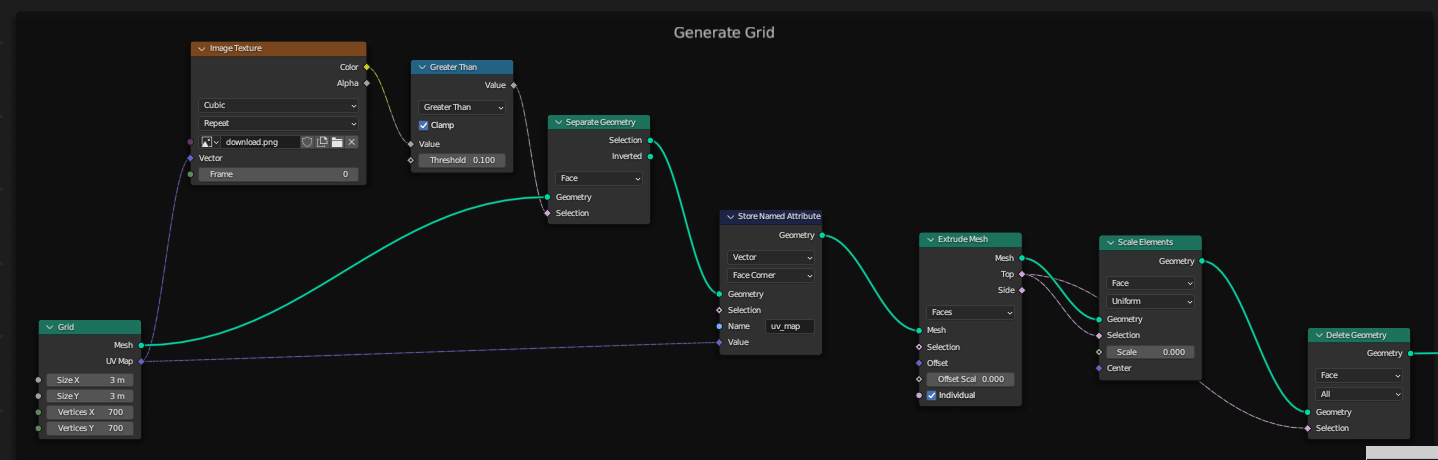
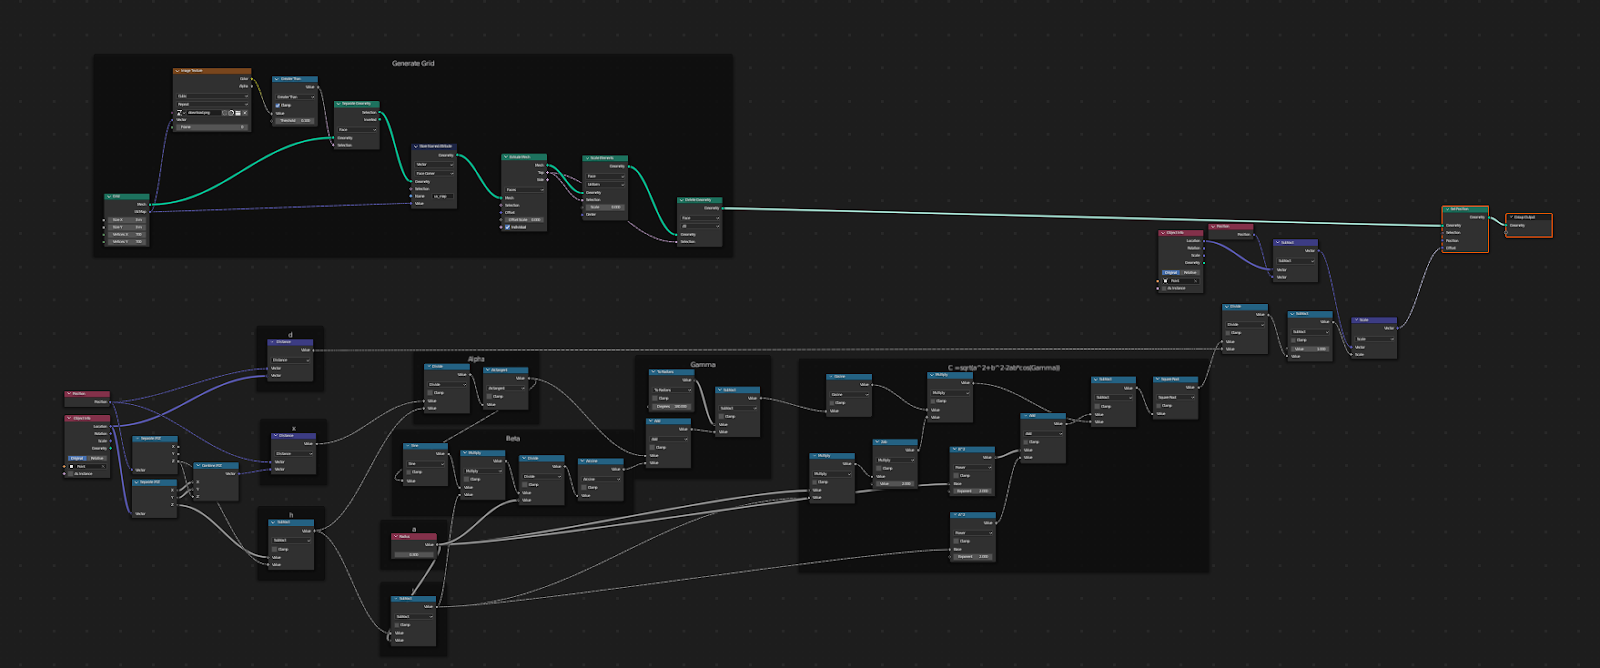
Blender Geometry Node diagrams:
Top: the part we added with custom image support
Bottom: The overall flow
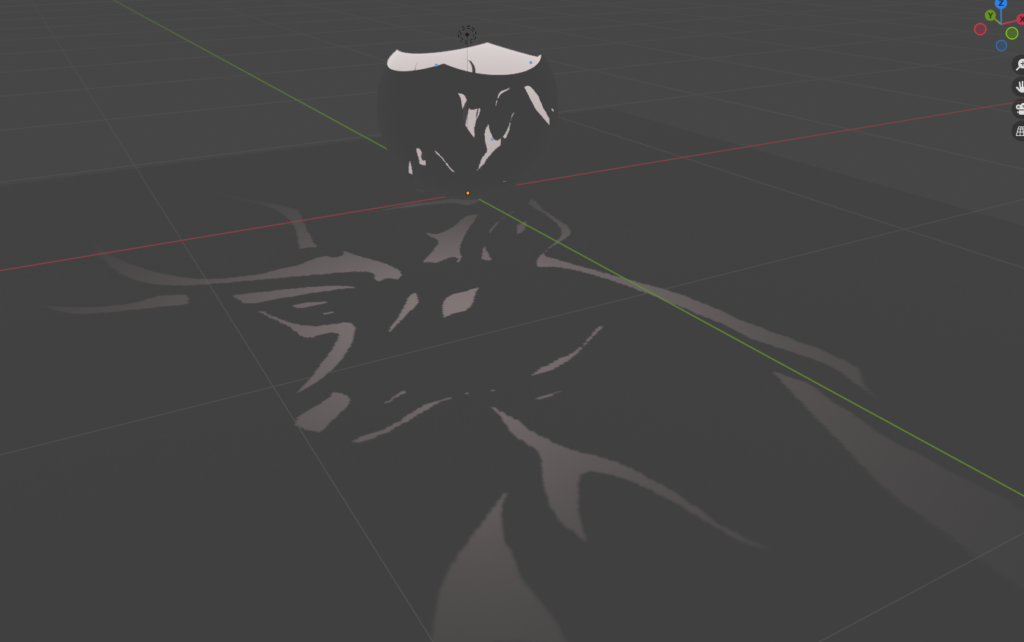
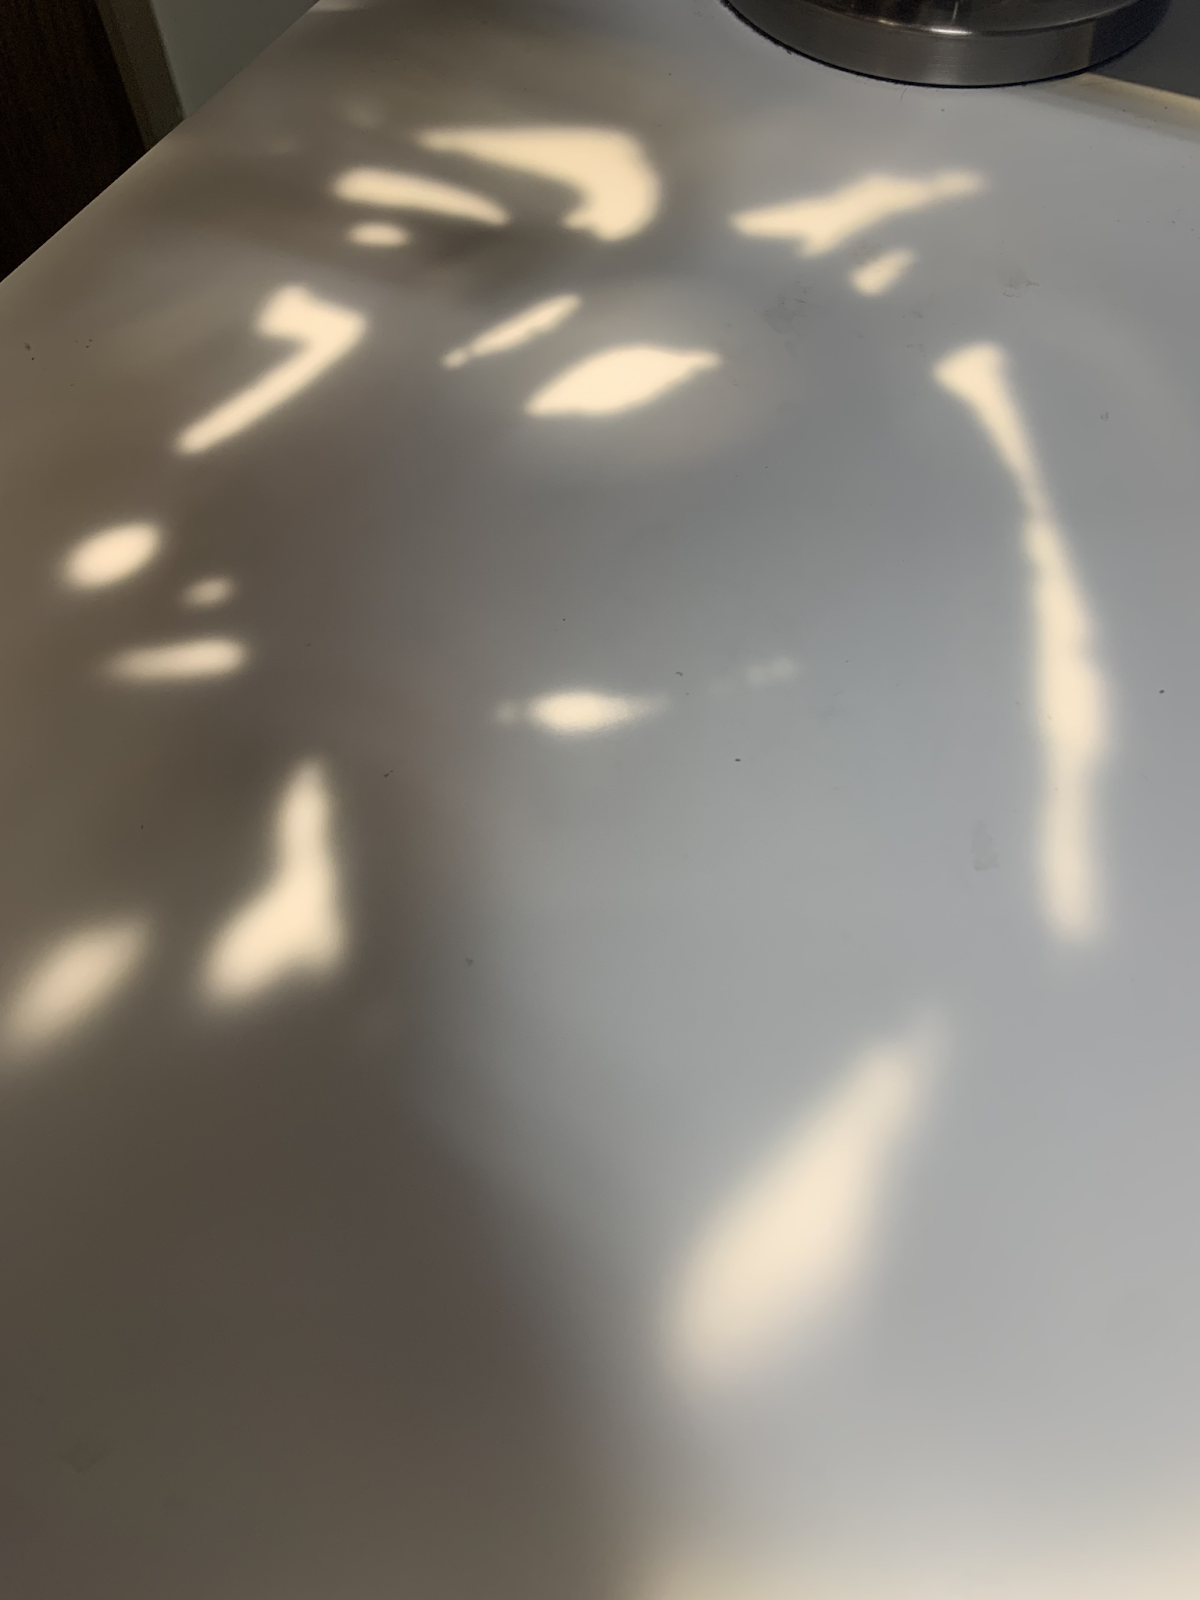
Stag stereographic projection in real life
Once we had a working STL model, we moved on to the printing phase. Our first few iterations had a few problems. One model failed because we had no infill whatsoever, so the printer tried to print solely the outer layers of our shell, which promptly collapsed in on themselves. Another failed during a filament refill. Ultimately though, we were able to get a few models off of the print bed successfully. However, this still had some problems. Particularly in areas of the model with thin holes, printer supports could easily get stuck and needed to be manually chiseled out, and even then, rough edges meant that the definition of the shadow was poor. However, we did make one print of a spaceman from the game Among Us with no internal holes whatsoever. This print did particularly well, as no supports ended up blocking the outer shape.
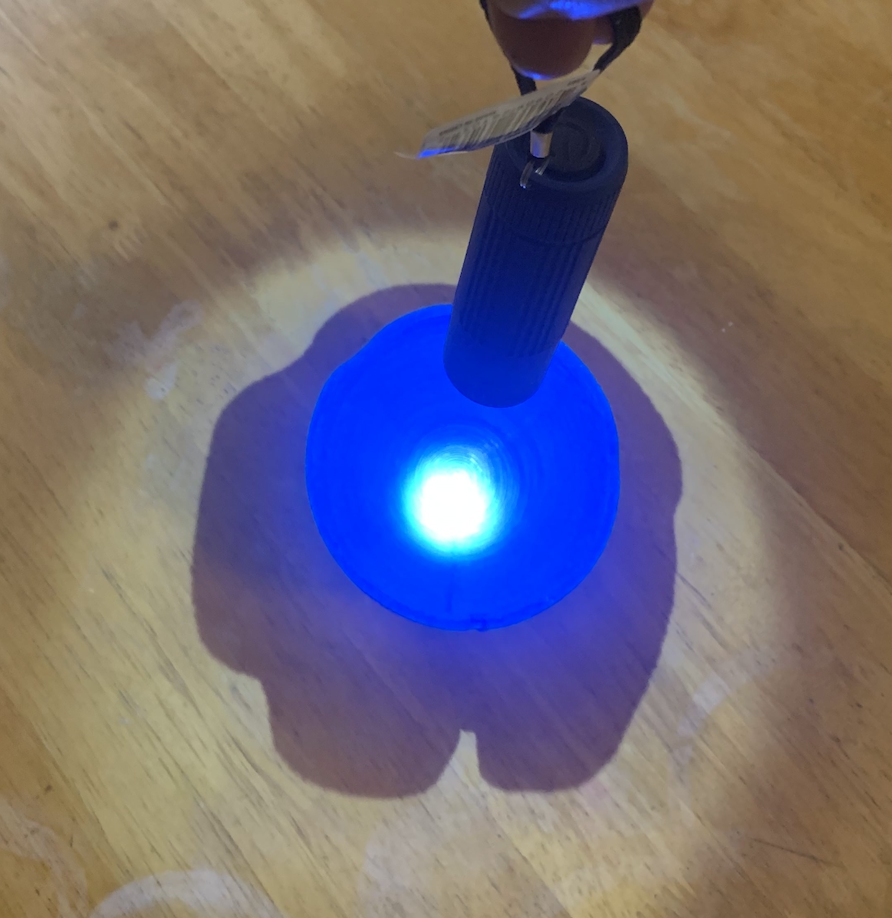
One of the working builds (the shadow is a crewmate from the hit video game Among Us)
We also tried to print a more finely detailed shape in the dust-printer. This would be ideal, since the dust printer’s design means supports are unnecessary, which would solve our biggest issue with the models. However, we were unable to find a proctor on duty who knew how to use the machine, and so that got put on hold.
Part of the base Blender file we used to create the model used trigonometry to convert the plane to a sphere. Essentially, we took the line connecting the top of the sphere (where the light would be placed) and connected it to the corresponding place on the plane. We then figured out where this intersected the sphere (see pic below from stack overflow post):
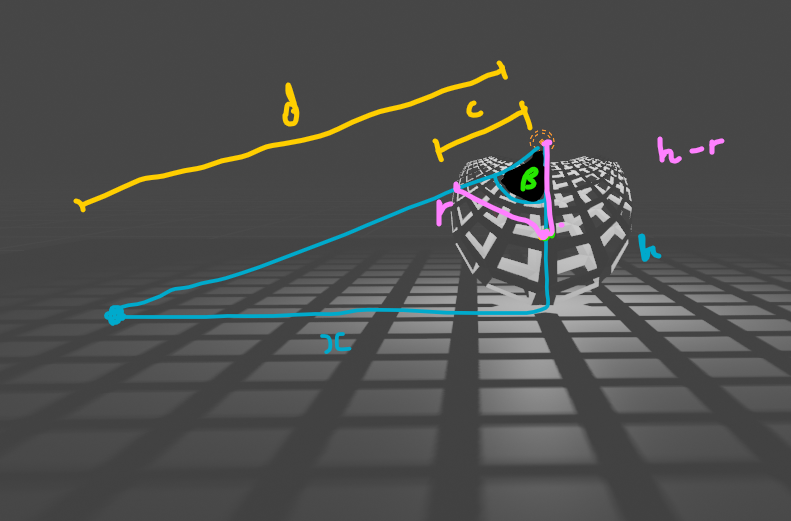
The overall mathematical concept is the Stereographic Projection, a way of mapping a sphere onto a plane. Stereographic projections are fascinating, especially since their existence basically shows that there is a bijection from an infinite plane to the surface of a sphere (except the top of the sphere). There is also a 2D variant that shows a bijection from a circle to a line, the math behind which is shown here (and is very similar to the 3D case):
https://www.cut-the-knot.org/pythagoras/StereoProAndInversion.shtml
This project was really interesting and fun, and if we had more time, we’d make some modifications. One such modification made it easier to render the STL file for printing. We ended up with two solutions, one of which has a lot of triangles in the render and thus takes a long time to print, while the other has fewer triangles but takes more time to render due to there being more steps involved in Blender. Another modification we thought of is adding a stand in the middle of the sphere for the light, rather than having to shine the light manually.
Overall, we had a lot of fun, and both ended up with our own model. Now all we have to do is upload an image and hope the print doesn’t fail and we can have almost any projection we want!
Leave a Reply