Surface Minimizing Bubbles🫧
Mathus taught me how to use soap bubbles to find the minimal surface area of a shape I create. I created these shapes using Zometools.
Mathus gave me some guidance on what kind of shapes would be cool to make for this project, but left me with a lot of creativity. Mathus let me know that starting out simple with the blue Zometools would be easier than working with the green ones. So, initially I started out with a cube:

I saw that the bubble edge lines came together in the center to create a square. It looked almost like a 4D hypercube!
I then got rid of 6 edges to create a sort-of “half cube,” and saw a really cool bubble surface from the side-view that looked like a curve:

Lastly, I tried creating two of these “half cubes” and linking their corresponding vertices together with the green Zometools. This bubble surface created like a diagonal hexagon with bubble edges coming from the vertices:

I thought this project about minimal surfaces was really interesting! I saw a blog online that solved this Plateau problem using variational calculus. I thought it was really neat how the solution that they solved for looked almost identical to the actual soap bubble shape made with the rings!
https://mathematicalgarden.wordpress.com/2014/09/06/soap-film-and-minimal-surface/: Surface Minimizing Bubbles and PenRose TilingsLastly, I thought that this video of a transformable hypercube soap bubble was super cool! The motion of the hypercube adds a cool dimension to the model:
PenRose Tilings!
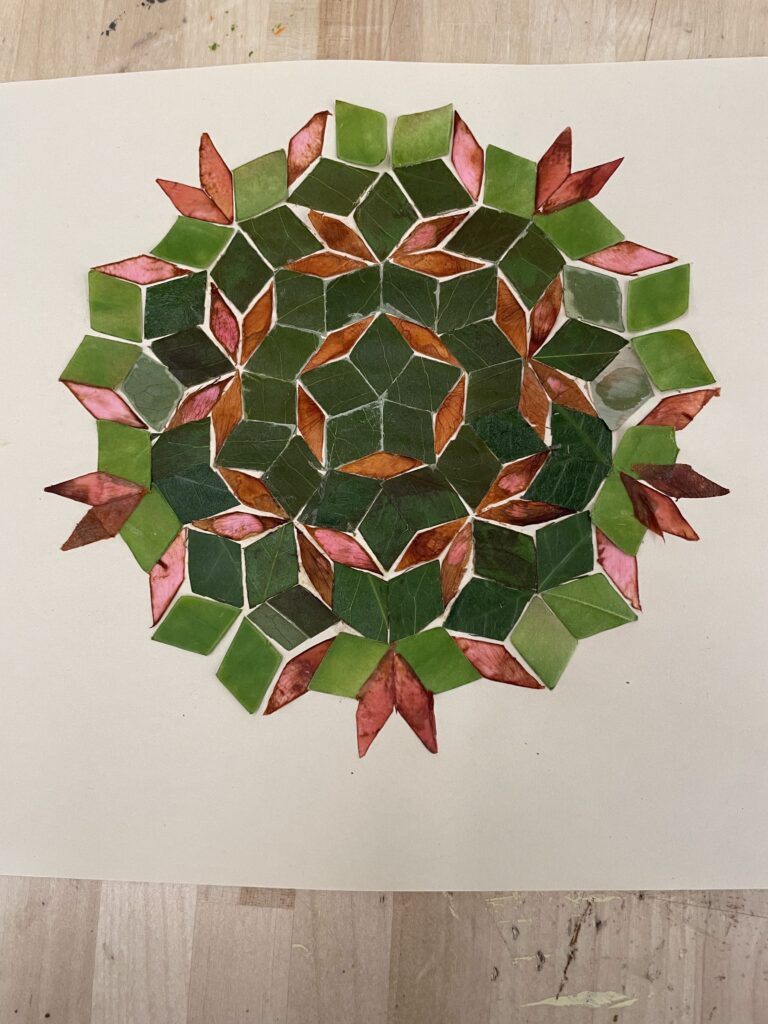
Ashley provided me with an in-progress version of the final Penrose tiling, along with materials of leaves and flower petals, and a wooden framing device to make the cut shapes more consistent. She also provided me with a reference diagram of the fractal:
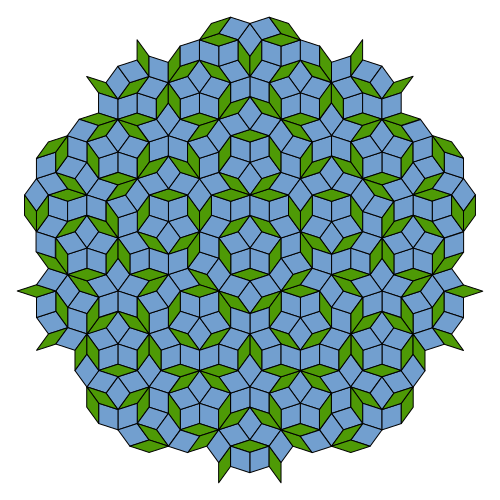
https://en.wikipedia.org/wiki/Penrose_tiling
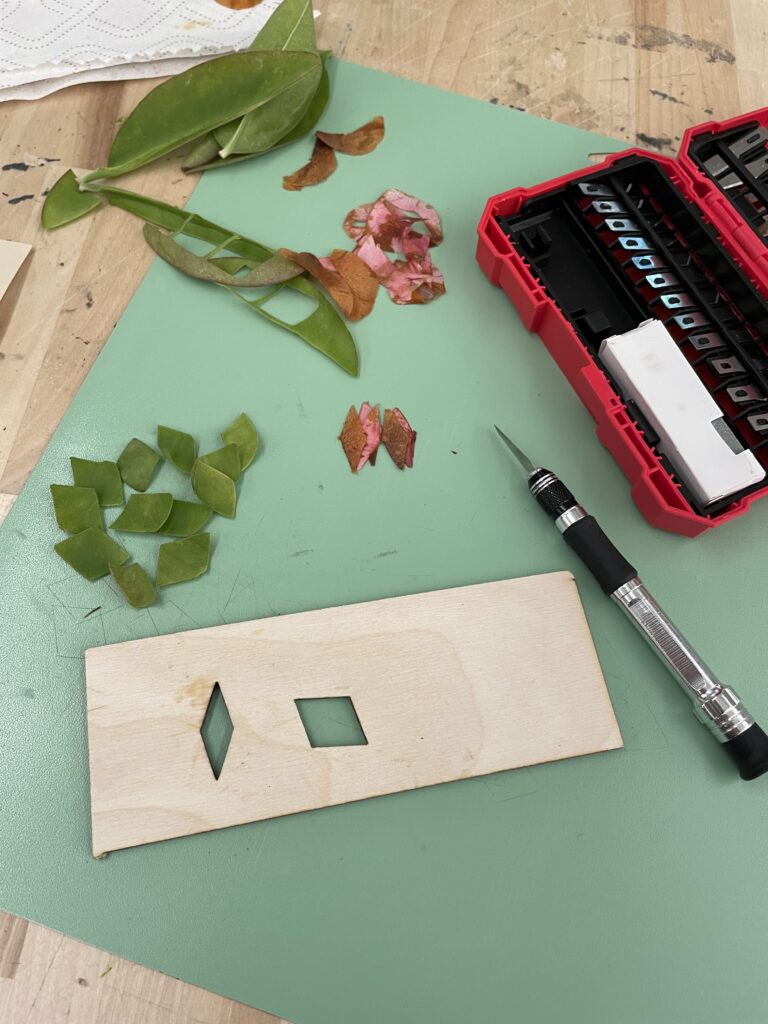
First, I tried making more units. I used a stencil to cut shapes from leaves and petals. I used the provided wooden framing block to make the shapes consistent. It was a bit hard to reach the corners at first, but I eventually got the hang of it. Below is a photo of the cut out plant material along with the wooden frame and the knife.
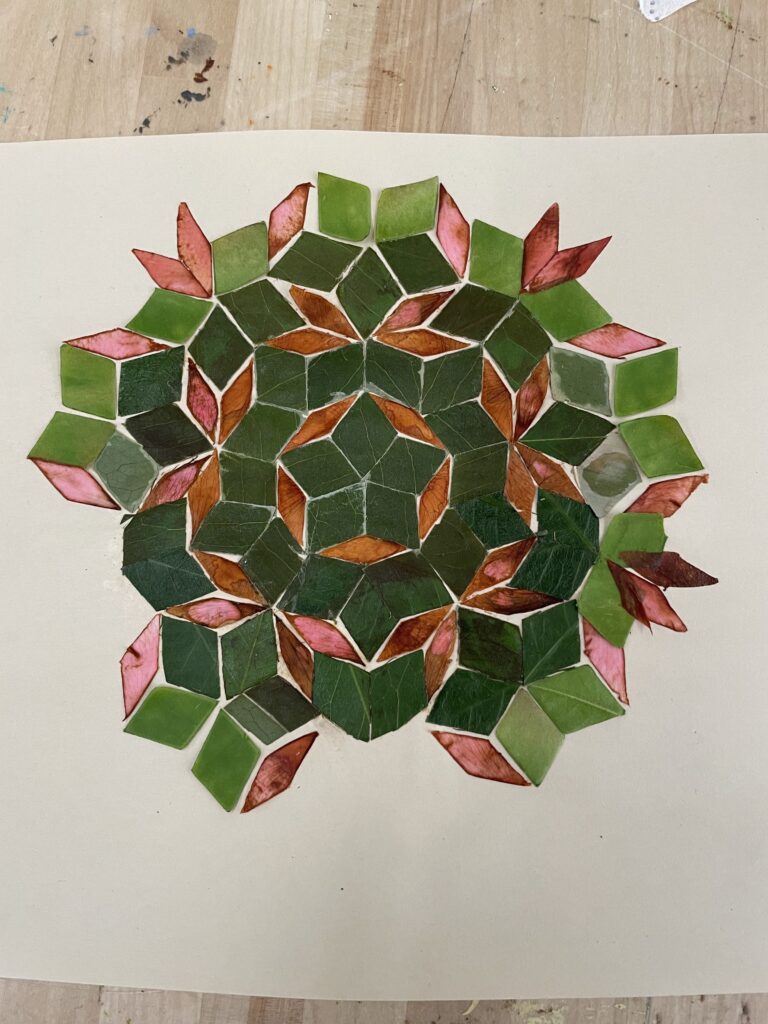
Afterwards, I put glue on one side of each of the shapes and attached it at the relevant location to the rest of the tiling. Below is the in progress photo.
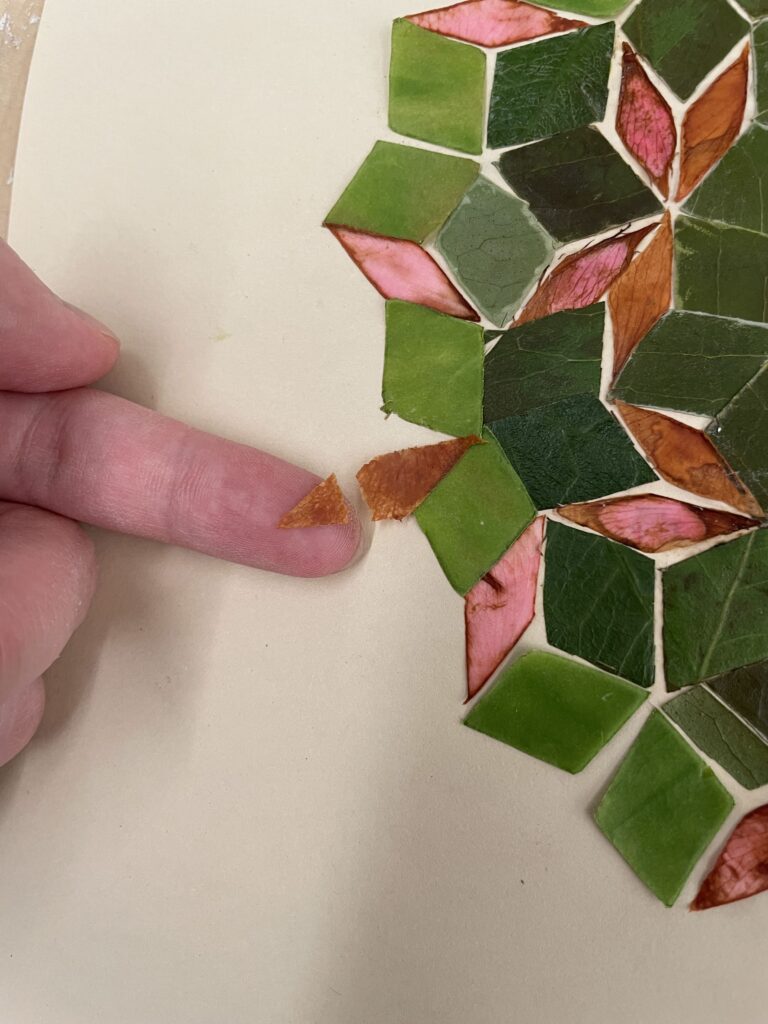
Some challenges included dealing with slightly out of line tilings and having to overlap shapes to ensure everything still fit. The flower petals were also pretty fragile, and I broke one when trying to glue it down.
Here is the final (for now) product!
Finally, there are variations of Penrose tilings that could be cool to explore or generate, such as this one that involves truncation of the polygons:

https://www.iucr.org/news/newsletter/volume-27/number-3/deformed-penrose-tiling-and-quasicrystals
Leave a Reply