For project 2, Delaney and I created the f4 and f5 tilings using mosaics!
Deciding on Material
Originally, we had planned to use dominoes and trominoes to represent the Padovan sequence. We wanted to use clay to create the tiles and 3D print a tray at a specific length n to hold the tiles. After talking to Prof. Kagey, we also considered using different types of media to create the same domino and tromino tiles. We thought about using legos, 3D printing tiles, using the laser cutter, maybe the woodshop, and etc. for our tiles.
Once we got to the Makerspace, we found these beautiful mosaic tiles, and we thought it would be a pretty idea to create the tilings using the glass tiles. With the number of mosaics we had, we thought it would be a better idea to represent the Fibonacci sequence (https://www.cut-the-knot.org/arithmetic/combinatorics/FibonacciTilings.shtml) rather than the Padovan. So we wanted to use squares and dominoes to represent our tiling instead.

We hoped to use the mosaics to fill a wooden board with all types of tilings within an f4 and f5 tiling.

Here’s a cool youtube video about the Fibonacci Tilings:
As well as the online encyclopedia of integer sequences for the Fibonacci sequence:
Creating the tilings
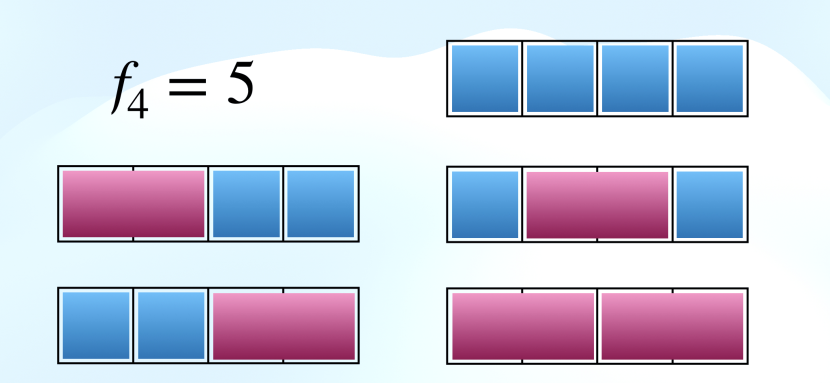
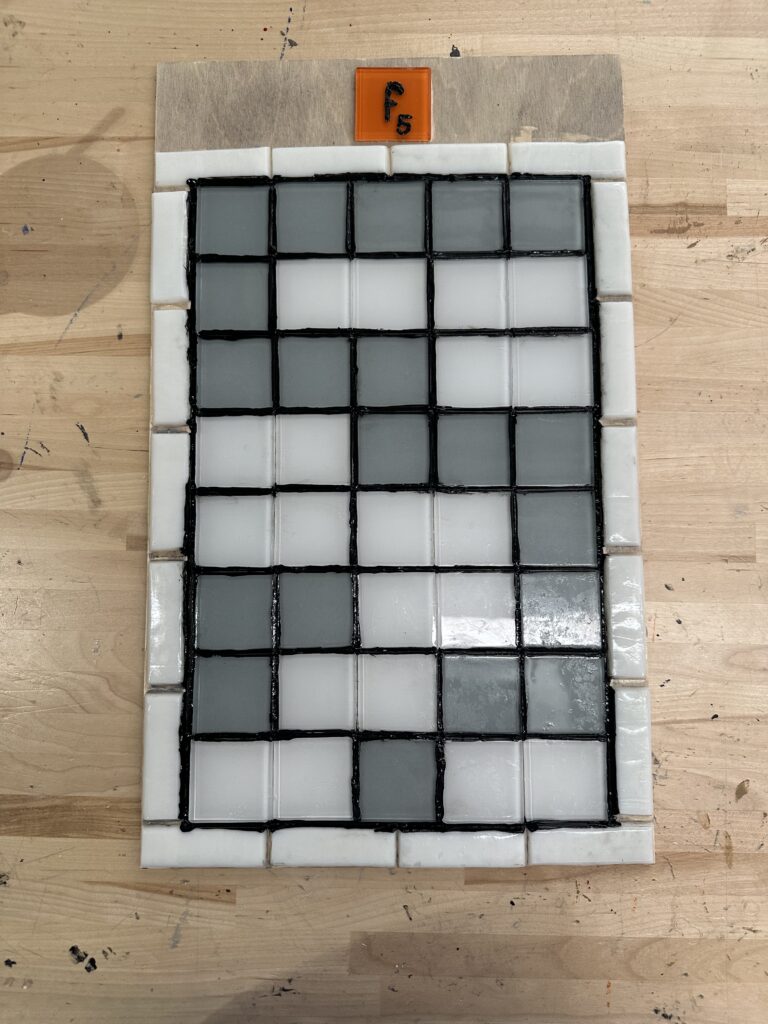
We laid out how what order we wanted the tilings to be in based on what we thought looked aesthetically pleasing. The left board is the f5 tiling and the right board is the f4 tiling. We used the darker gray tiles to represent squares and the white tiles to represent dominoes. We tried to lay out the tilings for the f5 board to have the gray tiles show a “5”. The f4 was harder to do a nice pattern out of so we kept it simple and kept the tiling how it is usually represented (https://www.math.wichita.edu/discrete-book/section-counting-fib.html), with first a row of all squares, then 1 domino that moves through 3 possible positions, and a row with 2 dominoes.

We used the laser cutter wood from the Makerspace and wanted to use the orange tiles at the top to label f4 and f5 tilings. We used epoxy glue from the Makerspace to attach the mosaics to the wooden board.


After presenting our prototypes during in-class presentations, we received feedback that it may be helpful to have a way to distinguish between the square and domino tiles. So for the f4 tiling, we separated the dominos and squares from each other, and on the f5 tiling, we drew black outlines between the tiles.
Here are the final products!

Leave a Reply