by Jaanvi Chopra and Kishore Rajesh
What is Tensegrity?
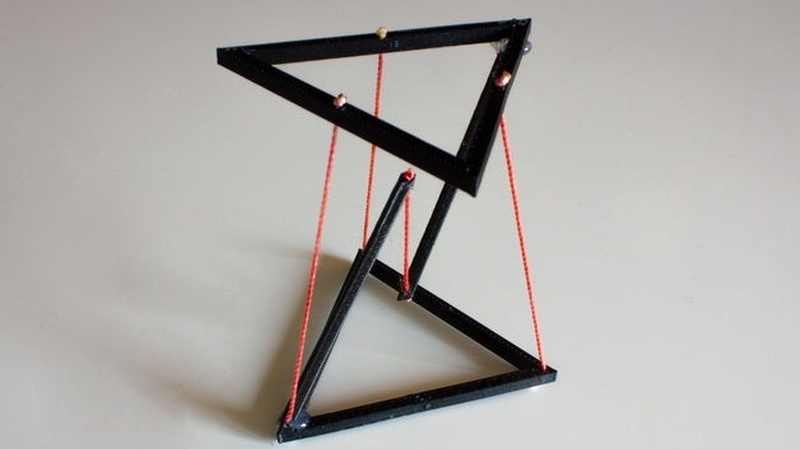
A tensegrity structure is usually made of two pieces, one which stays flat, and another which seemingly “floats” on top. The name comes from “tension” and “integrity.” Basically, the top part is supported by the tension in the center string/chain connecting it to the bottom part and the side strings/chains are there for support. This leads to a really cool effect since people expect the side strings to bear all the mass. Below is an example of a simple tensegrity structure.
Outside of math, tensegrity is used in architecture (to make bridges), biology (to model muscles in the human body), and art (where it surprisingly has a rich and detailed history).
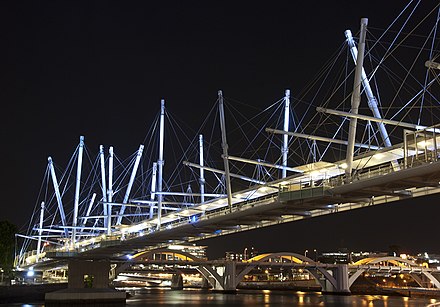
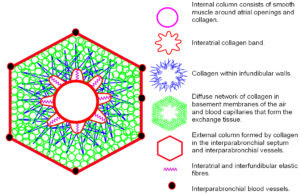
Above is the largest tensegrity bridge in the world. Below is a model of a cell using tensegrity:
This is a piece by Kenneth Snelson, which inspired the concept of “tensegrity” in art:
The reason tensegrity works is due to the center having all the tension. Note the force diagram below: The string on the side isn’t keeping the structure from falling down, but rather from tilting.
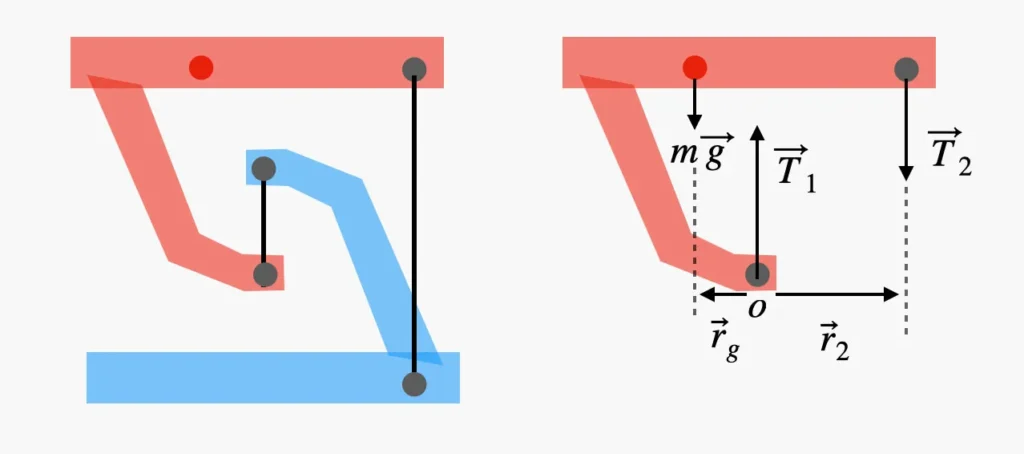
There are also some cool symmetry groups in action. Note that the above structure is rotationally symmetric. Furthermore, more complicated structures need to have some sense of rotational symmetry in order to balance.
Procedure
Our intention for this project was to create our own tensegrity structure. These were our goals for each week
Week 1:
- Follow a tutorial on building a DIY tensegrity structure – This step was crucial for understanding the basic principles and mechanics behind tensegrity
- Using the general materials in the makerspace, experiment and figure out how to balance the forces as necessary for the structure.
Week 2:
- Iterate on the findings of the experimentations from week 1
- Design files for the laser cutter
- Learn how to use the laser cutter
Week 3:
- Scale up from the popsicle stick structure
- Learn how to use machines in the wood shop to cut wood
- Assemble the pieces to create final tensegrity structure
Prototyping
We first tried to make a small tensegrity structure using popsicle sticks and string. It did not work too well. Here’s what we tried:
First, we found a youtube video on how to make it, basically gluing popsicle sticks together, using a drill to cut holes, and using string to tie it all together. Instead of drilling, we originally used the laser cutter to cut holes in the sticks, and since the Makerspace was out of superglue, we used tape. However, we realized that we couldn’t use the laser cutter with tape, so we have to use the drill. Our first attempt was very off balance, due to the tape and uneven drilling:


Our next try went a bit better, as we used superglue for the sticks instead of tape, making the end result more balanced. While it held its shape for a bit, it inevitably fell apart after a while.
Crafting a Wooden Tensegrity Structure: Our Process and Outcomes
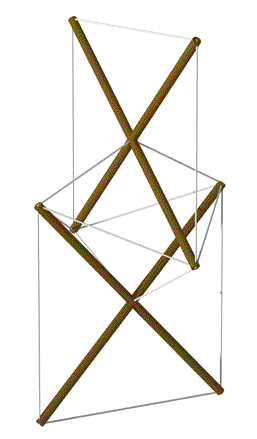
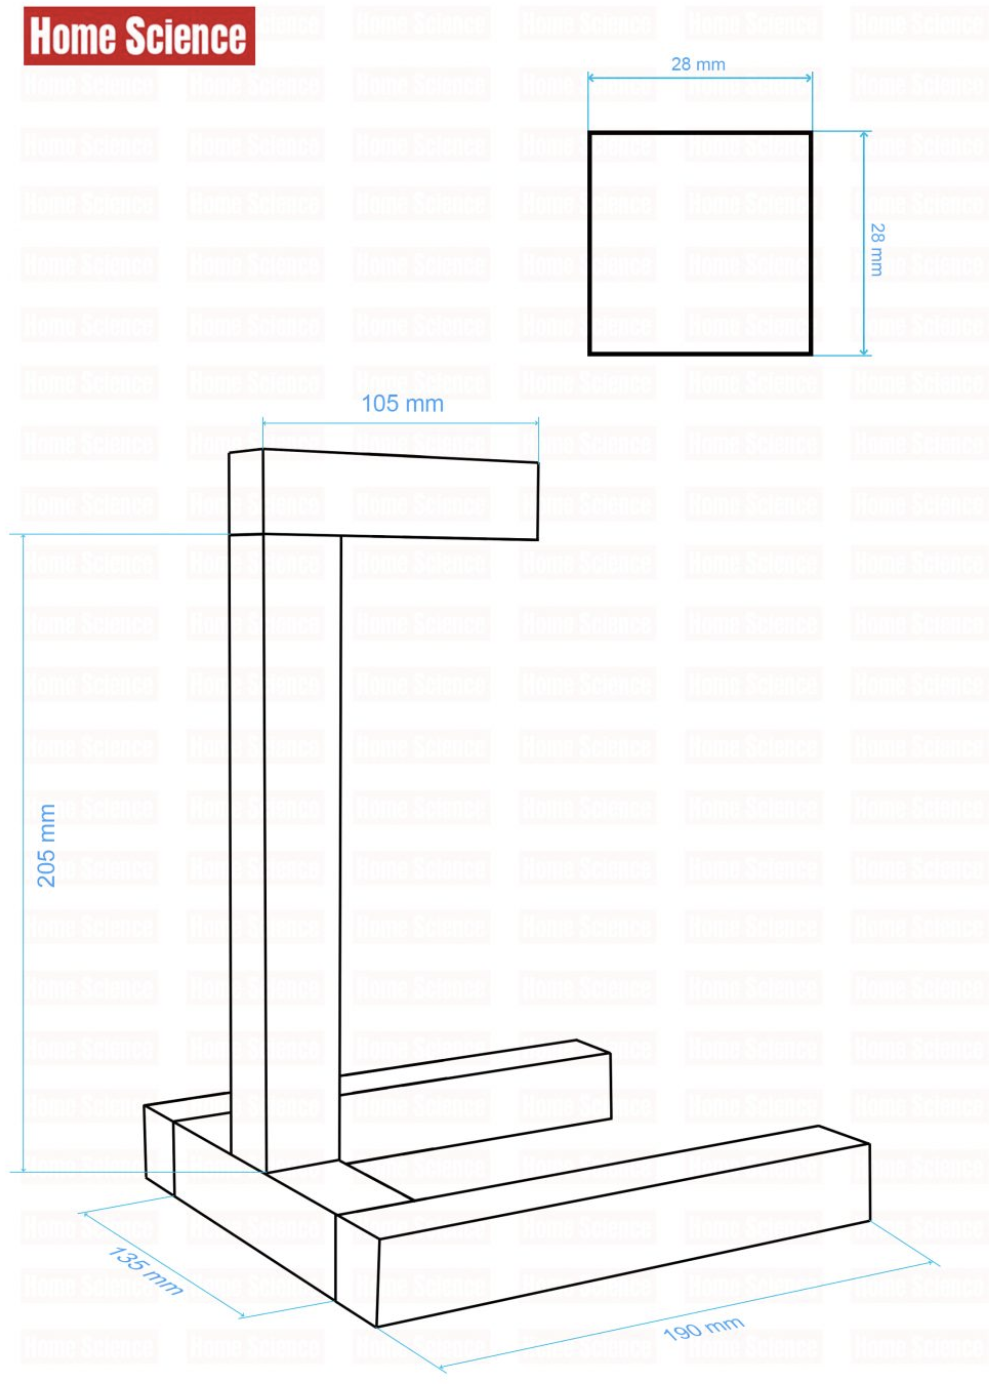
The last iteration of our project involved constructing a wooden tensegrity structure. Our initial step was to design our structure. We decided to follow the design below in order to maintain the physical principles of tension and stability. We believed by following a preexisting design we would be able to have a strong foundation for our project.
We designed our wooden structure based on the design below:
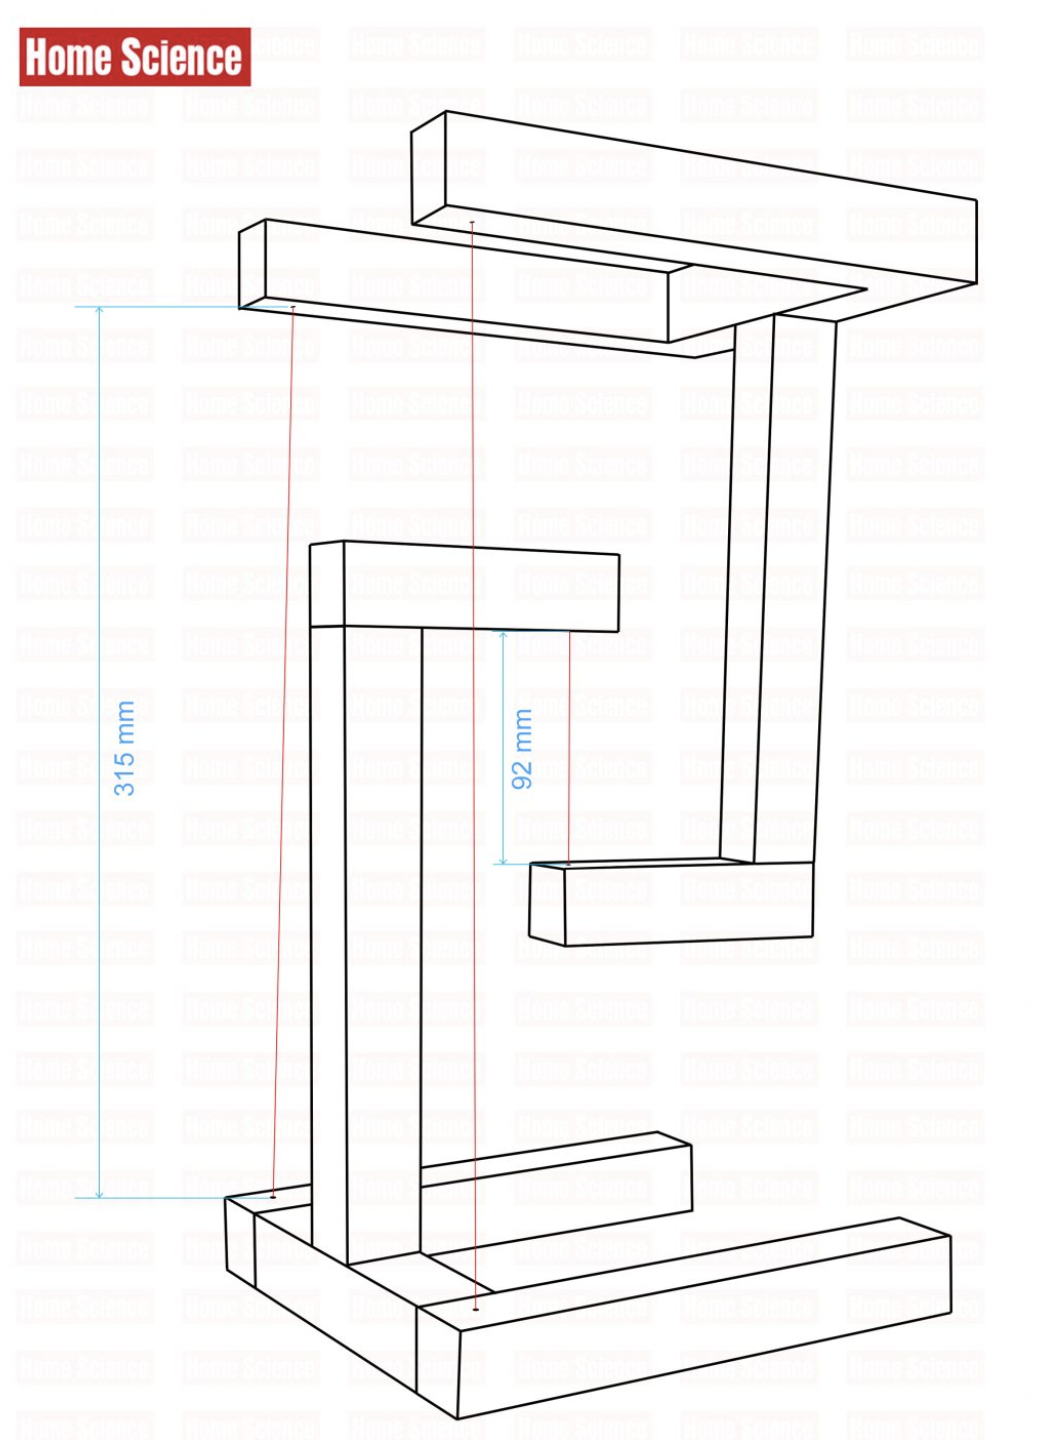

Our primary material was wooden dowels. We decided to use these because they were easy to measure and cut them to the lengths that we required. Additionally, we felt that the wood was an aesthetically pleasing choice as well. After cutting the wood, we drilled holes in the designated dowels to help us add chains later on in the process.
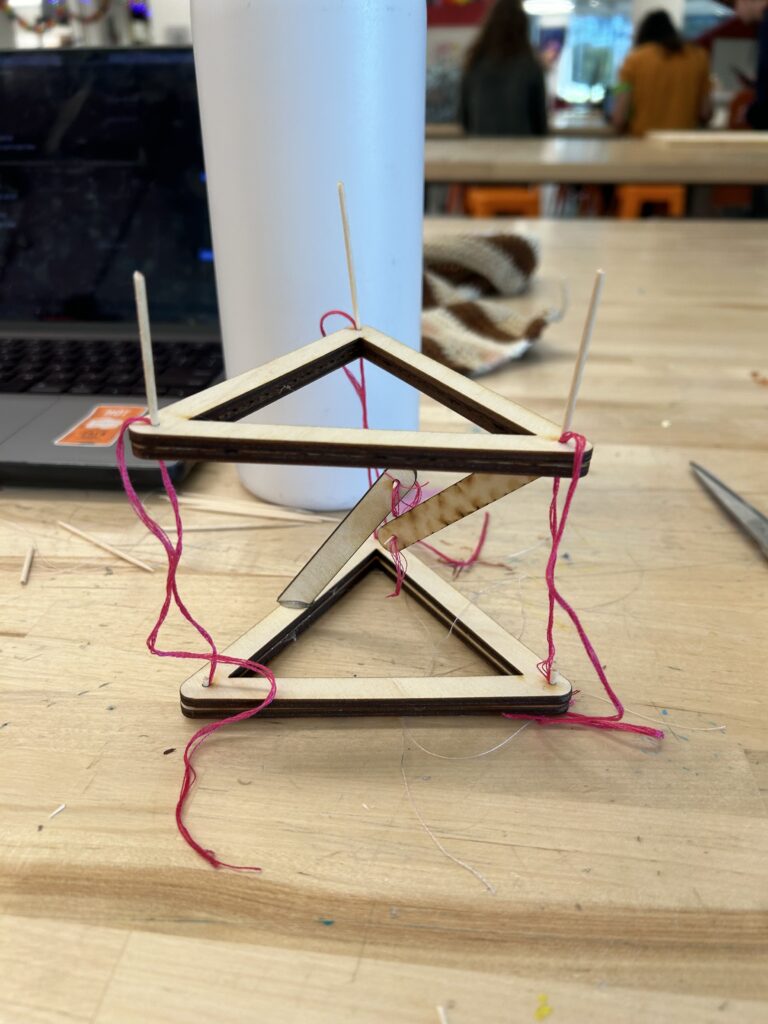
After hot gluing the structure together, we tried to balance the pieces using chains. We decided to use chains because in our previous iteration, we found that the string’s elasticity made it difficult to maintain tension.
This is the structure we ended up with:
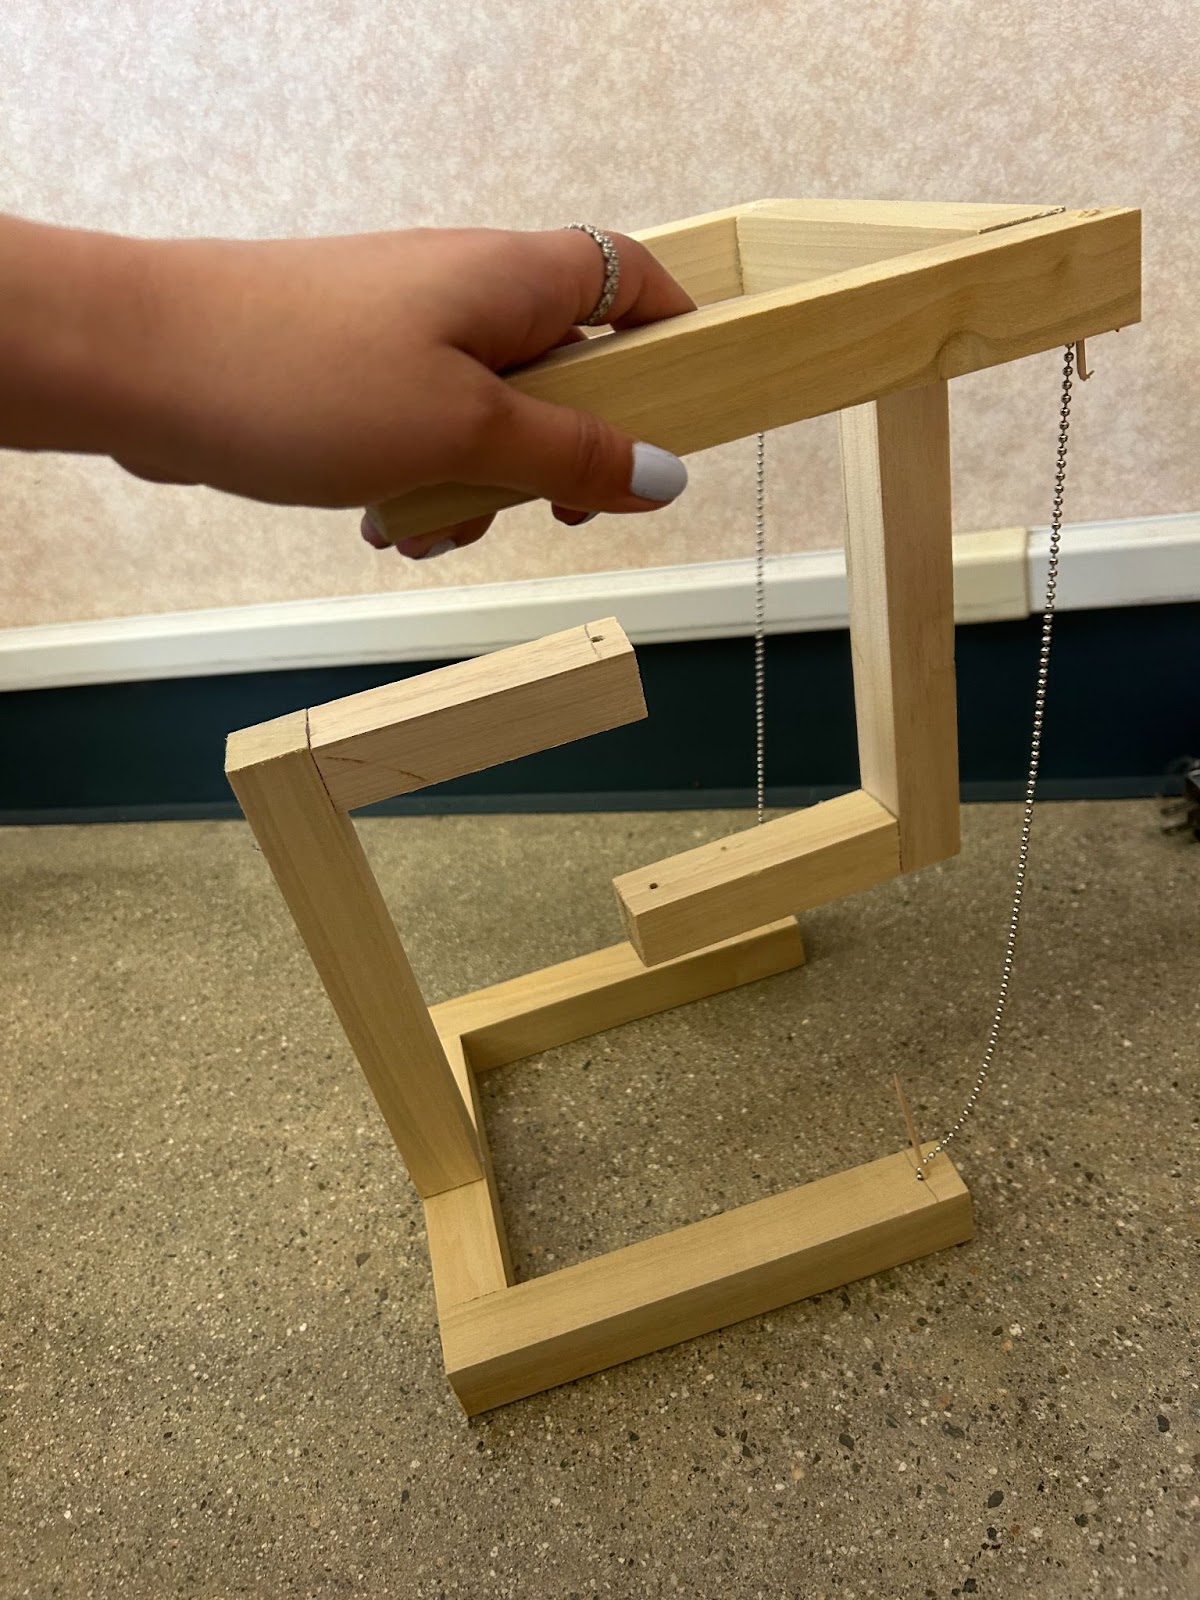
However, we were unable to get the forces to balance out and the structure kept collapsing.
This outcome, while initially disheartening, became a valuable lesson for us. It reminded us of the intricate balance between design and physics and reminded us that we should give ourselves time to do more trial and error. Perhaps next time we could try to compute the forces we are working with instead of relying on online sources. This may allow us to figure out what is going wrong when the structure is not stable in a more effective way.
Leave a Reply