Making Math was a great opportunity for me to see the beauty of mathematics through 5 different projects, each of which explored a new mathematical concept and used some technology that I was previously unfamiliar with. This blogpost is an overview of everything I’ve done for this class, and walks through each of the projects I did!
Project 0A – Sphericoin Art
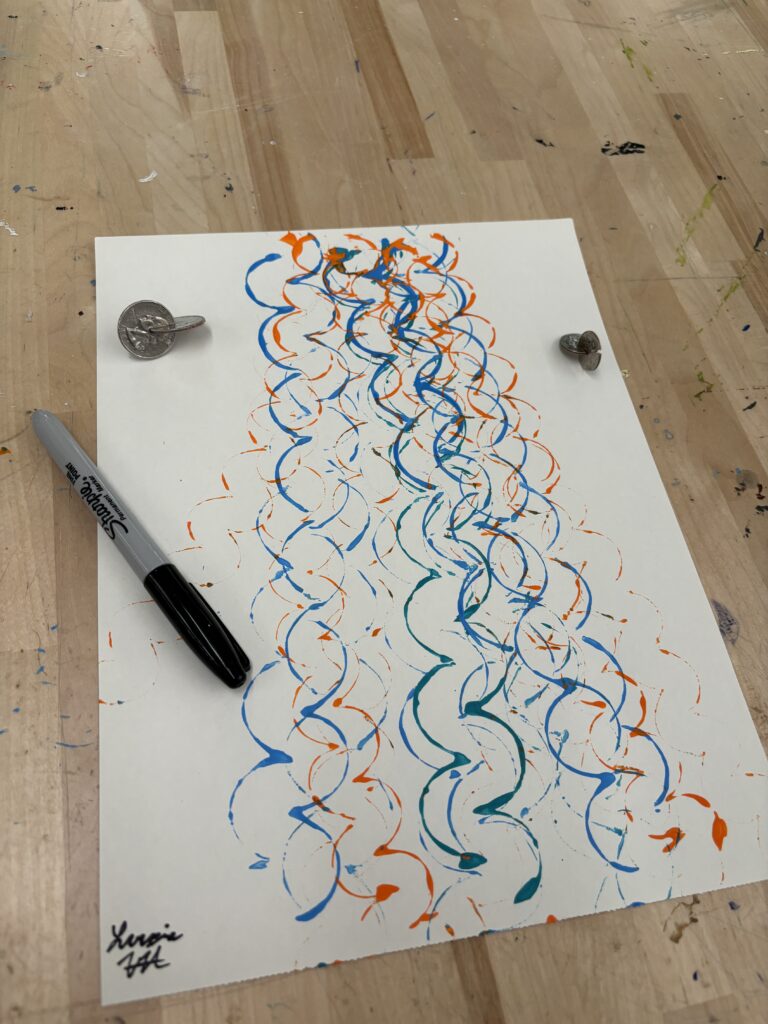
The first project I took on for this class was creating art using a Sphericon, which is a type of shape that can be obtained by “rotating a symmetric polygon about a mirror axis to get a solid of revolution, cutting that solid into two equal pieces, and then putting the pieces back together differently” (MOMATH). Lucie and I worked on this project together and decided to make simple sphericons using coins. In order to do this, we used a Dremel saw – a new technology for both of us – to cut into the center of different coins, and then hammered the two coins together, creating the following Spheri-coins:

Once our Sphericoins were made, we dipped them in paint and rolled them down a sheet of paper in order to capture their meandering paths. After doing this multiple times and with different types of paint, we were able to create the following prints, which we were both super happy with:
Project 0B – Making a Hexaflexagon
For the second part of Project 0, we swapped partners and taught each other how to create what each of us had made in Part 0A. I was paired with Linna, and she taught me how to create a Hexaflexagon, which is a 2D shape that has 3 different “sides” that you can fold into. To create this super interesting shape, we used the sewing machine, which I had never used before! Having learned how to sew, we were able to create a small fabric hexaflexagon. Here is a demo video of the hexaflexagon we made and its 3 different sides:
Project 1 – Creating a Gömböc
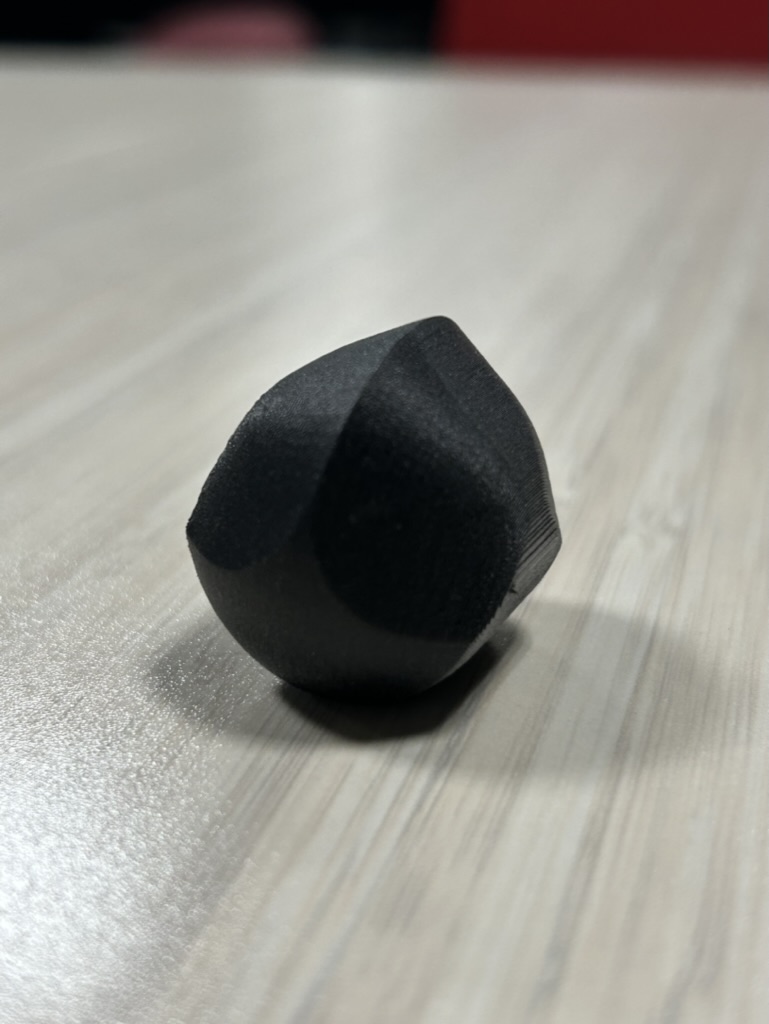
For our first, long-term project Lucie, Savva, and I partnered up in order to try and create a Gömböc. A Gömböc is the world’s first homogeneous, self-righting shape, which means that it is the first (and currently only) known shape in the world that has both uniform density and is self-righting. Given the “rarity” of this shape, as well as its strict proportions and density-constraints, we all knew that this was going to be a challenging project. However, in the spirit of this class, we thought it’d be a fun project to take on!
Our original plan to create the Gömböc was to print out an STL model we found of it using the most basic 3D printer (in order to get the shape right) and then try to create a silicon mold out of our print to then be able to cast our own resin Gömböcs. However, given that none of us had used the 3D printers before, we had a lot of complications with the printers and ended up using all of our time figuring out how to use the different machines, including the LSUN, Prusa, Resin, Carbon Fiber, and ultimately the Powder printer. In the end, we were able to create two Gömböcs that we were mostly satisfied with. The one pictured below, which was made using the carbon fiber printer, and one that Prof. Kagey printed out for us using the powder printer.
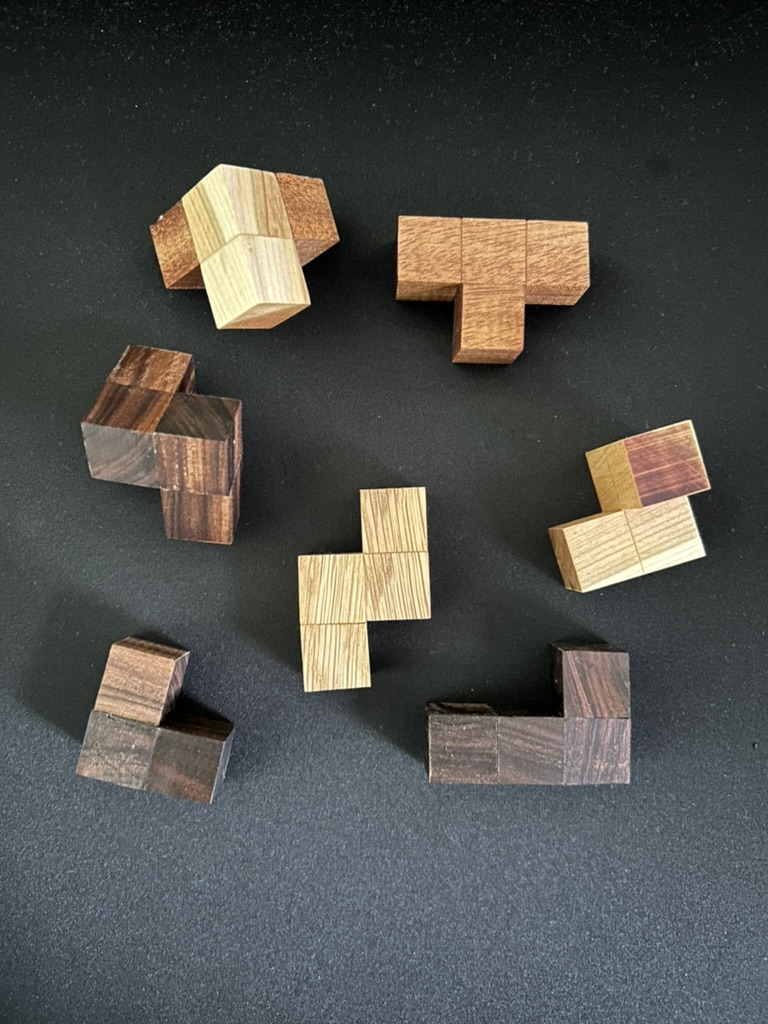
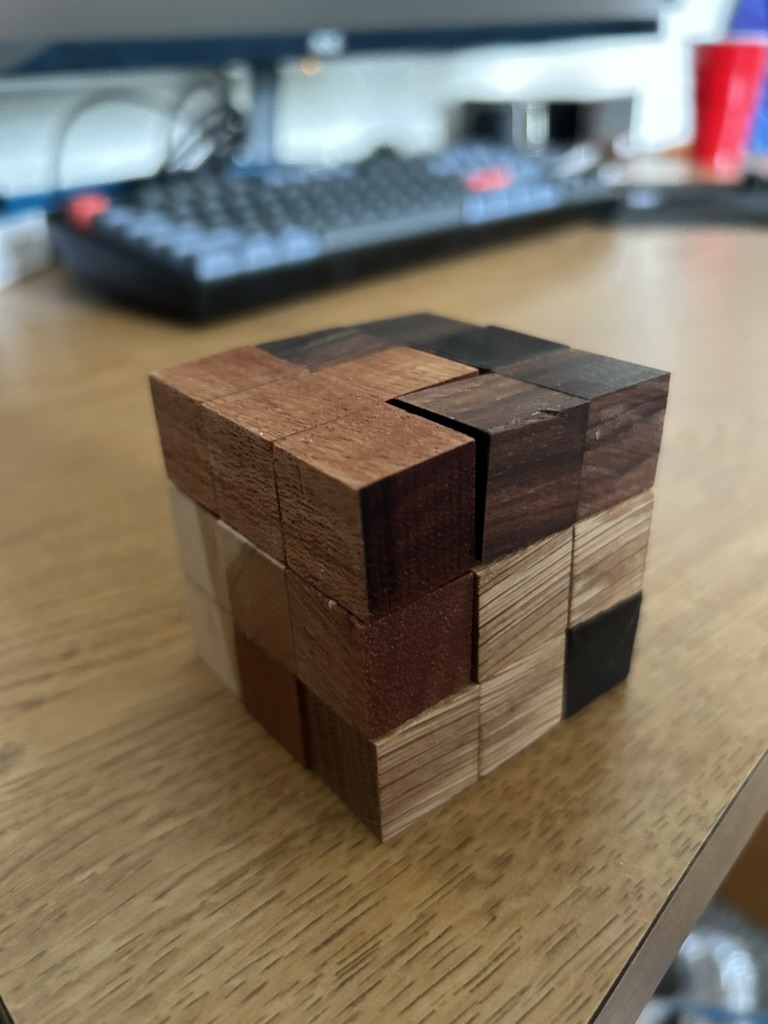
Project 2 – The Diabolical and Soma Cube
For Project 2, Lucie and I paired up again and decided to head into the woodshop to try and create our own 3×3 cubic puzzles. The interesting math behind these cubic puzzles is that, despite all of them having the same end goal (creating a 3×3 cube), two 3×3 cubic puzzles can vary widely in terms of possible solutions and puzzle difficulty. Therefore, in our blog post, we explored a bit of the math behind what factors make a puzzle “difficult”.
To create our different cubic puzzles, we used the vertical bandsaw and experimented with both wood and metal cutting. Unfortunately, our metal cutting wasn’t successful so we had to make both puzzles out of wood. However, we did get experience using some new machines in the machine shop, which was a great experience! Below are pictures of the nicer of the two cubic puzzles that we made: a wooden Soma cube.
Project 3 – Parametric Curve Posters
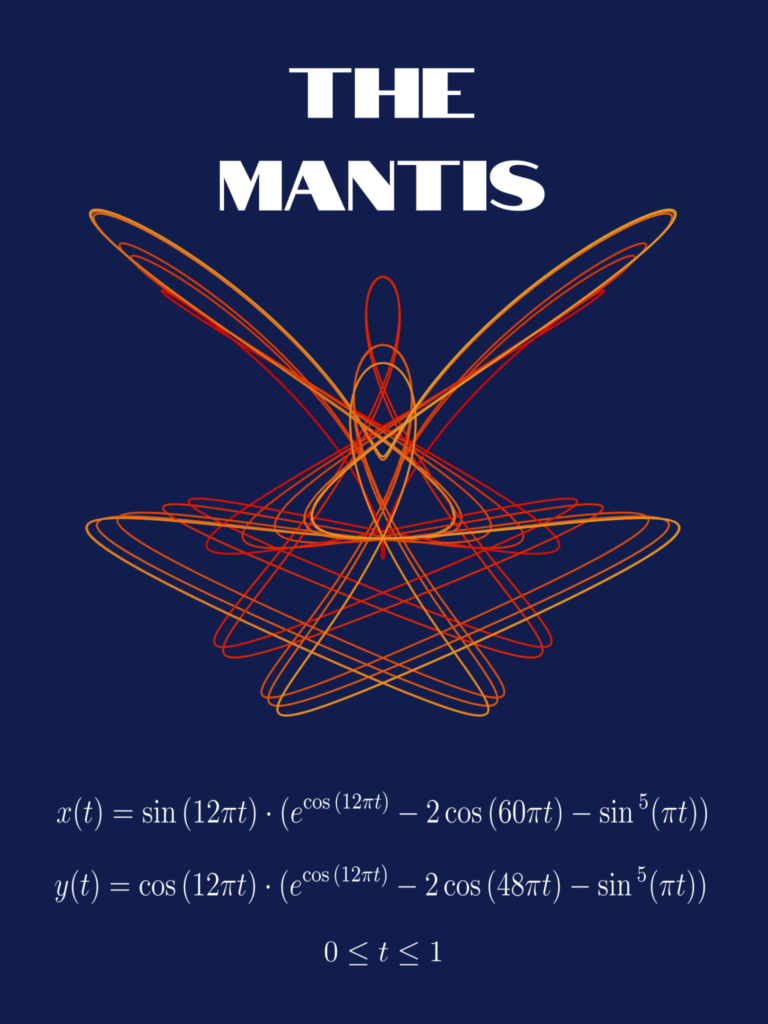
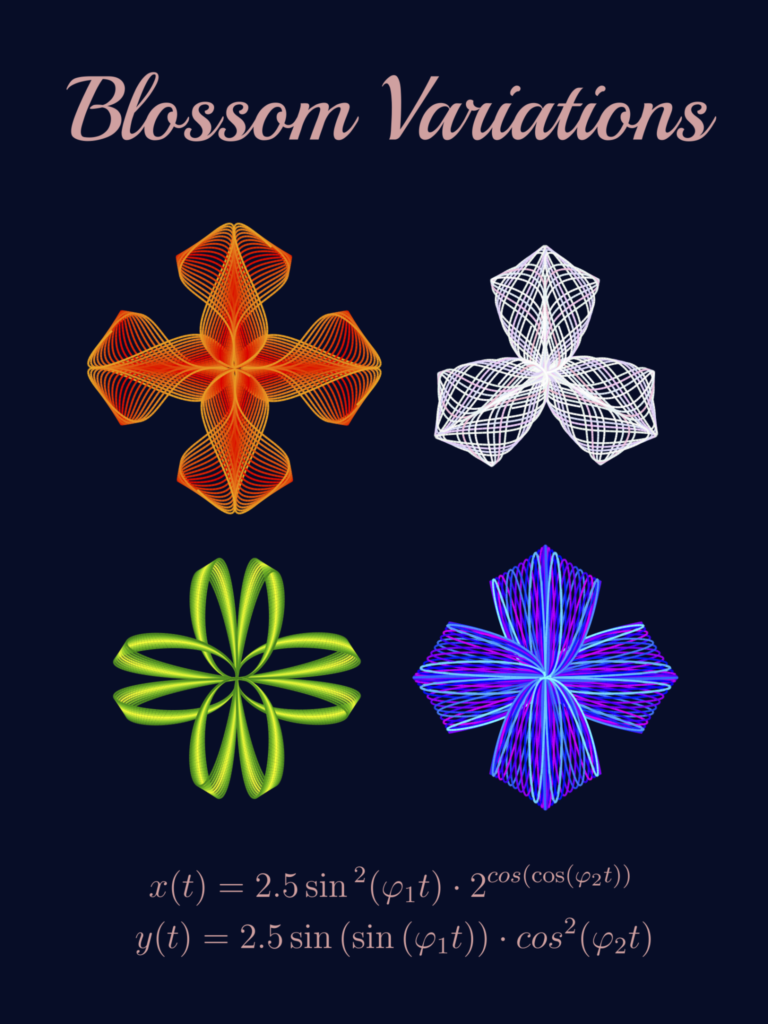
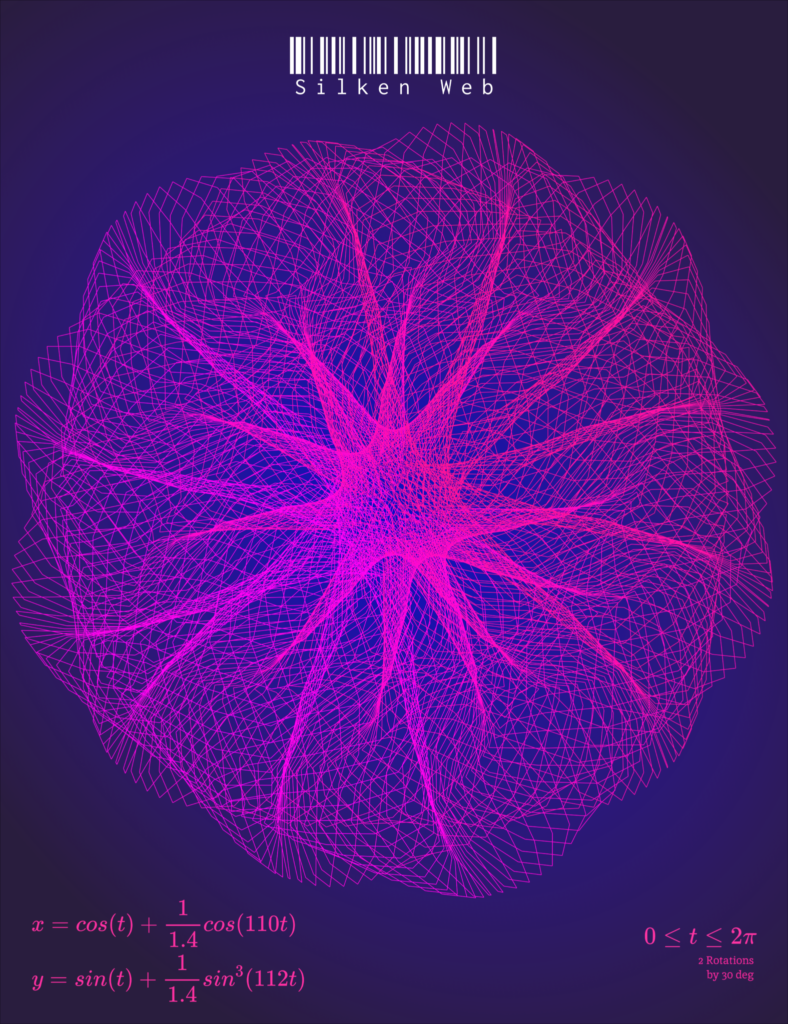
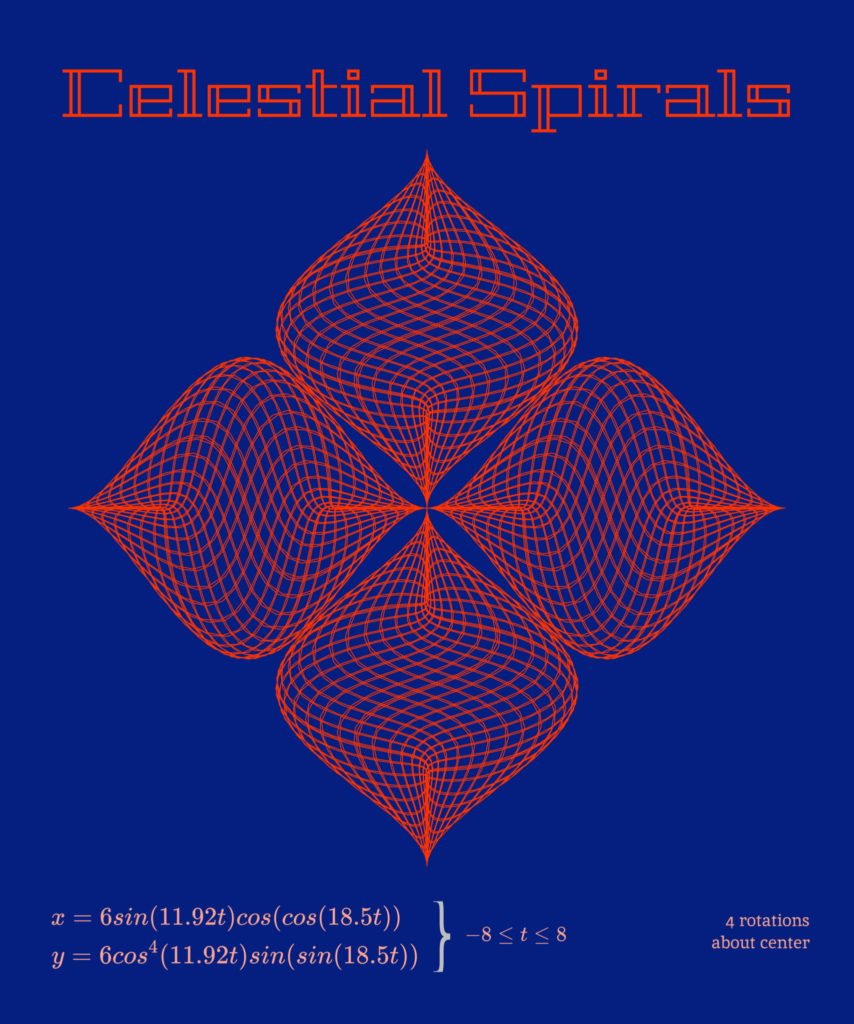
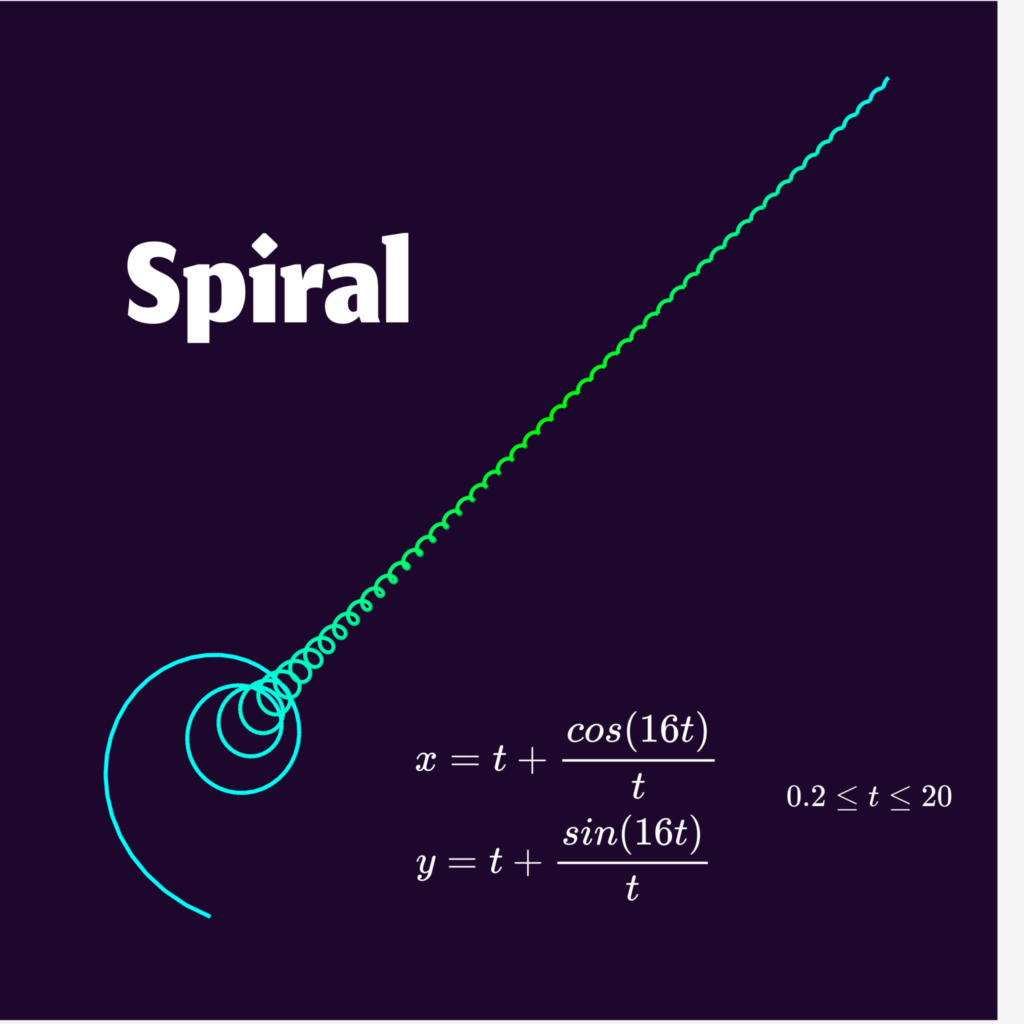
Finally, for Project 3, Ashley and I worked together to make posters that showcased cool parametric curves. To do this, we first used Python to generate colored SVGs of the desired parametric curves we wanted to print. Then, we put our SVG files into Figma and used Figma tools to create an actual poster out of the SVGs, including a name for our parametric equation, colorful backgrounds, compositions of our parametric curves, and the actual parametric curve equation. Once we had created our desired posters, we went ahead and printed some of them using the large format printer. This was a new technology for both of us, and it was super exciting to see just how easy it is to create our very own posters. Below are the posters we designed;
Summary
To wrap things up, here is a super quick summary of the mathematical topics and new technologies I explored for each of the projects mentioned above. Starting with the mathematical topics and concepts:
- 0A: Sphericons
- 0B: The Hexaflexagon
- 1: The Gömböc and Equilibrium Points
- 2: Cubic Puzzles of Varying Difficulty
- 3: Parametric Curves
And now the new technologies:
- 0A: Dremel Saw
- 0B: Sewing Machine
- 1: 3D Printers
- 2: Vertical and Horizontal Bandsaws
- 3: Large Format Printer
I really enjoyed making the most out of this class as a platform to explore new mathematical topics and technologies. I definitely learned a lot, and taking projects on without being afraid to fail really allowed me to go out of my comfort zone and learn a ton of new things. I’m super excited to see what new projects I take on in the future with the knowledge I’ve gained, and I encourage everyone to keep their making math passions alive!
Leave a Reply